Connect your BigChange account to Tugger and start pulling job management data into Power BI, Tableau, or Excel. Setup takes around 10 minutes.
What you'll need
- A Tugger account (sign up free)
- A BigChange account with access to the BigChange Developer Portal
- You'll need permission to create API keys in BigChange
Step 1: Add the BigChange connector in Tugger
- Log in to Tugger at tuggerapp.com
- Click Add Connector from the menu
- Select BigChange, then click Add Connector
You'll land on the BigChange Connector Settings page.
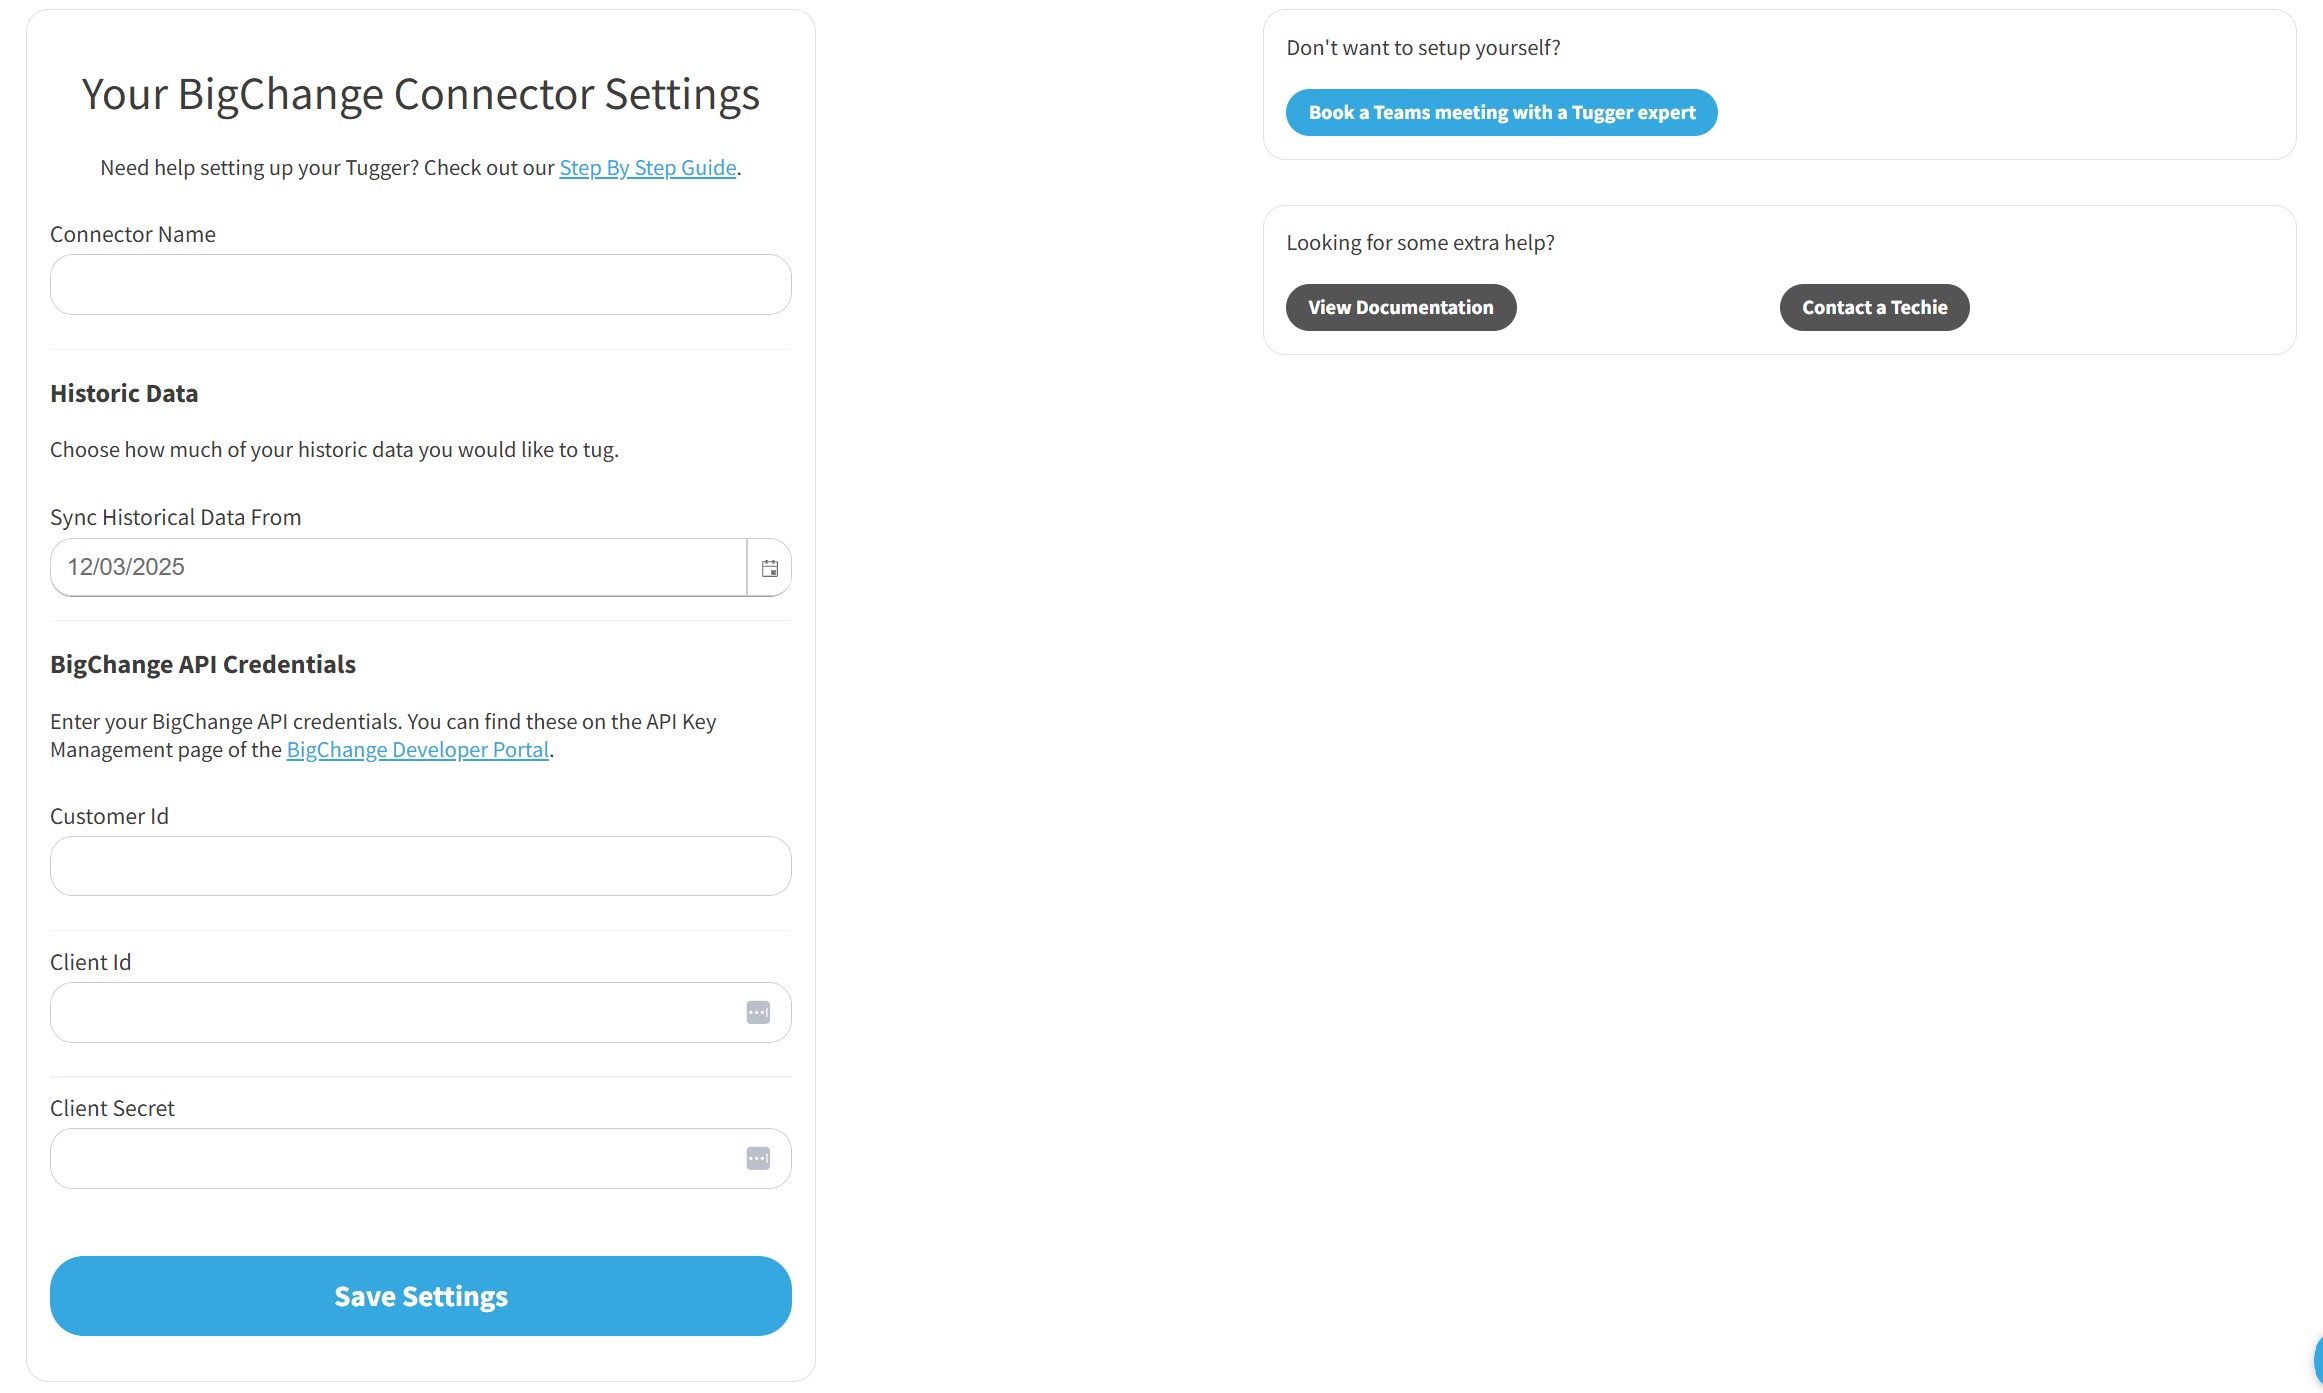
- Give your connector a name (e.g. "BigChange" or "BigChange - Operations")
- Set your Sync Historical Data From date - choose how far back you want Tugger to pull data. The further back you go, the longer your first sync will take.
Leave the API credentials fields blank for now - you'll fill those in after the next steps.
Step 2: Find your Customer ID and create an API key in BigChange
Tugger connects to BigChange using three credentials: your Customer ID, a Client ID, and a Client Secret. You'll find and create these in the BigChange Developer Portal.
- Go to the BigChange Developer Portal and sign in
- Navigate to API Key Management
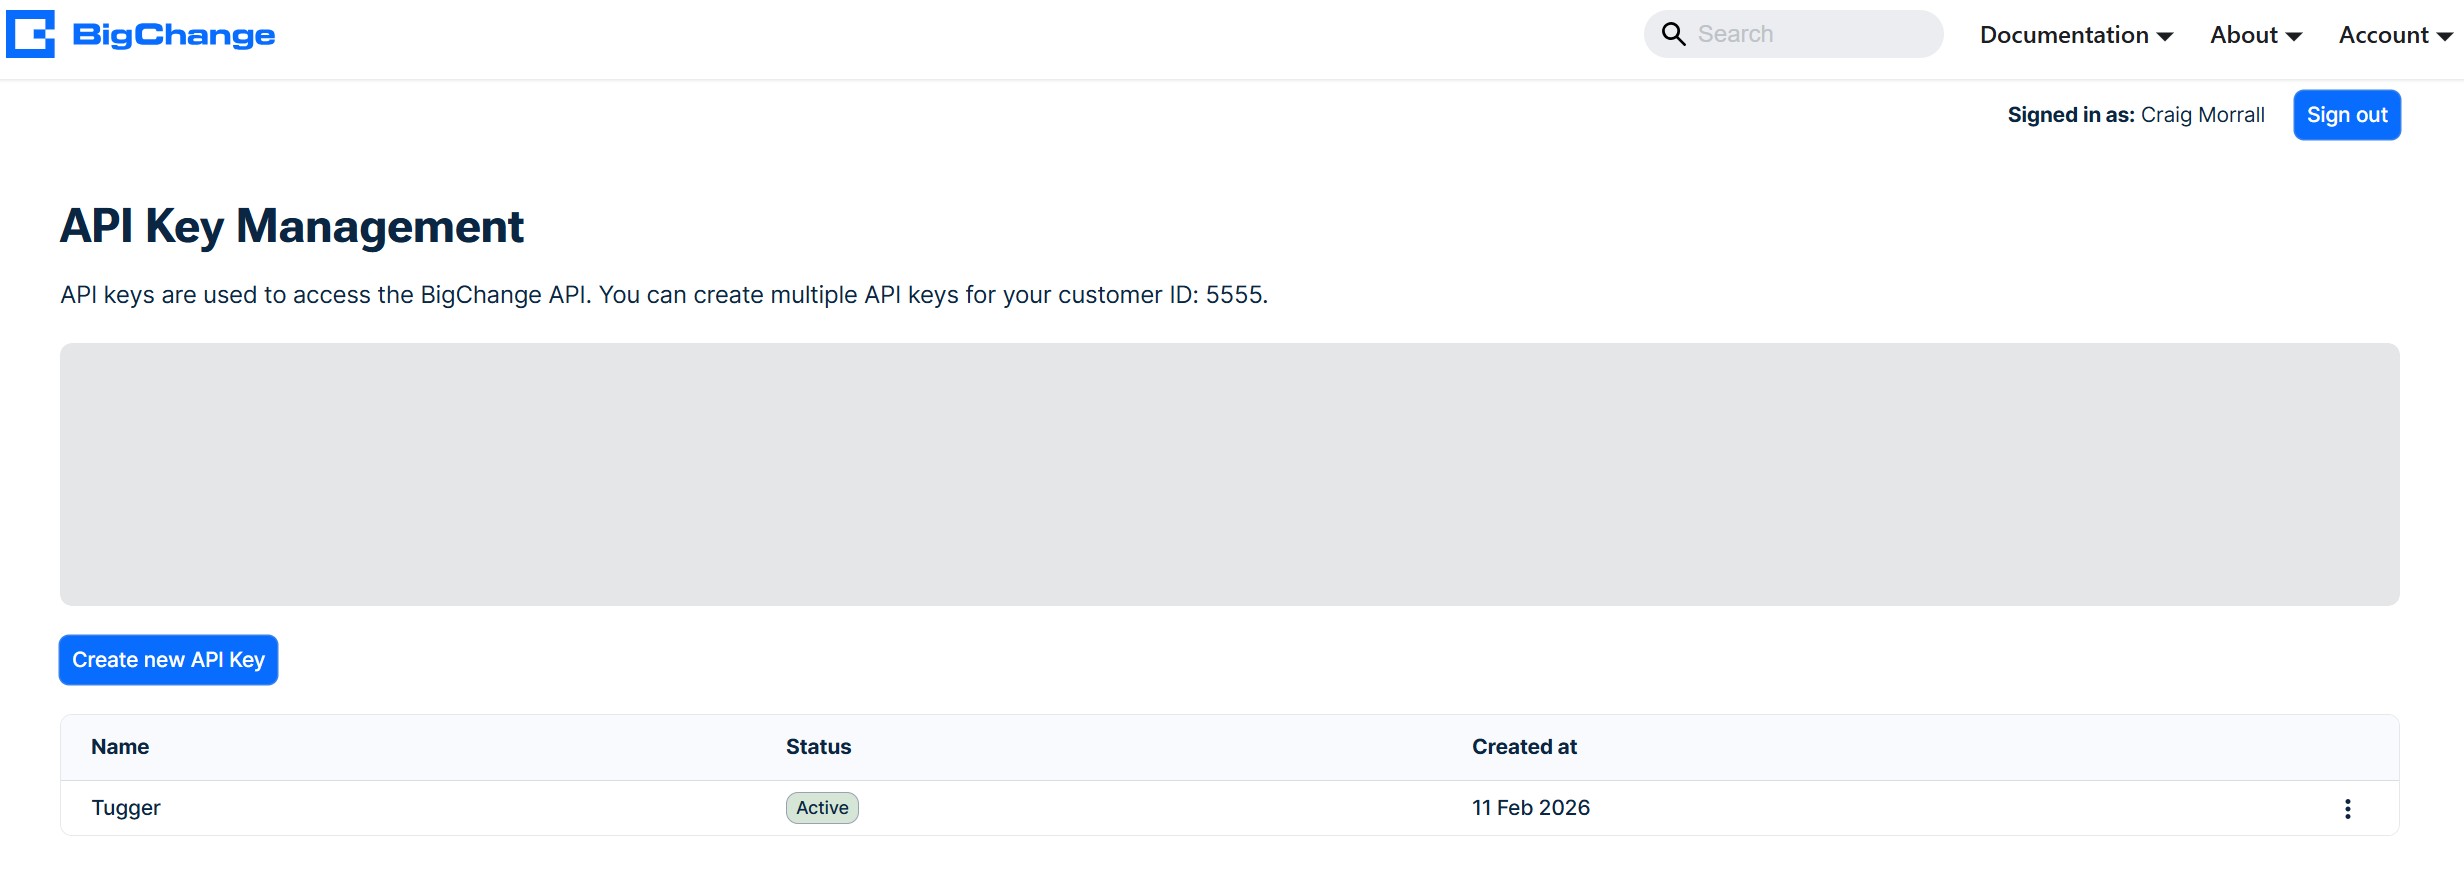
Your Customer ID is shown at the top of this page in the line that reads "You can create multiple API keys for your customer ID: XXXX". Make a note of it.
- Click Create new API Key
- Give your key a name (e.g. "Tugger") and optionally add a description
- Under Scopes, select all of the following read permissions:
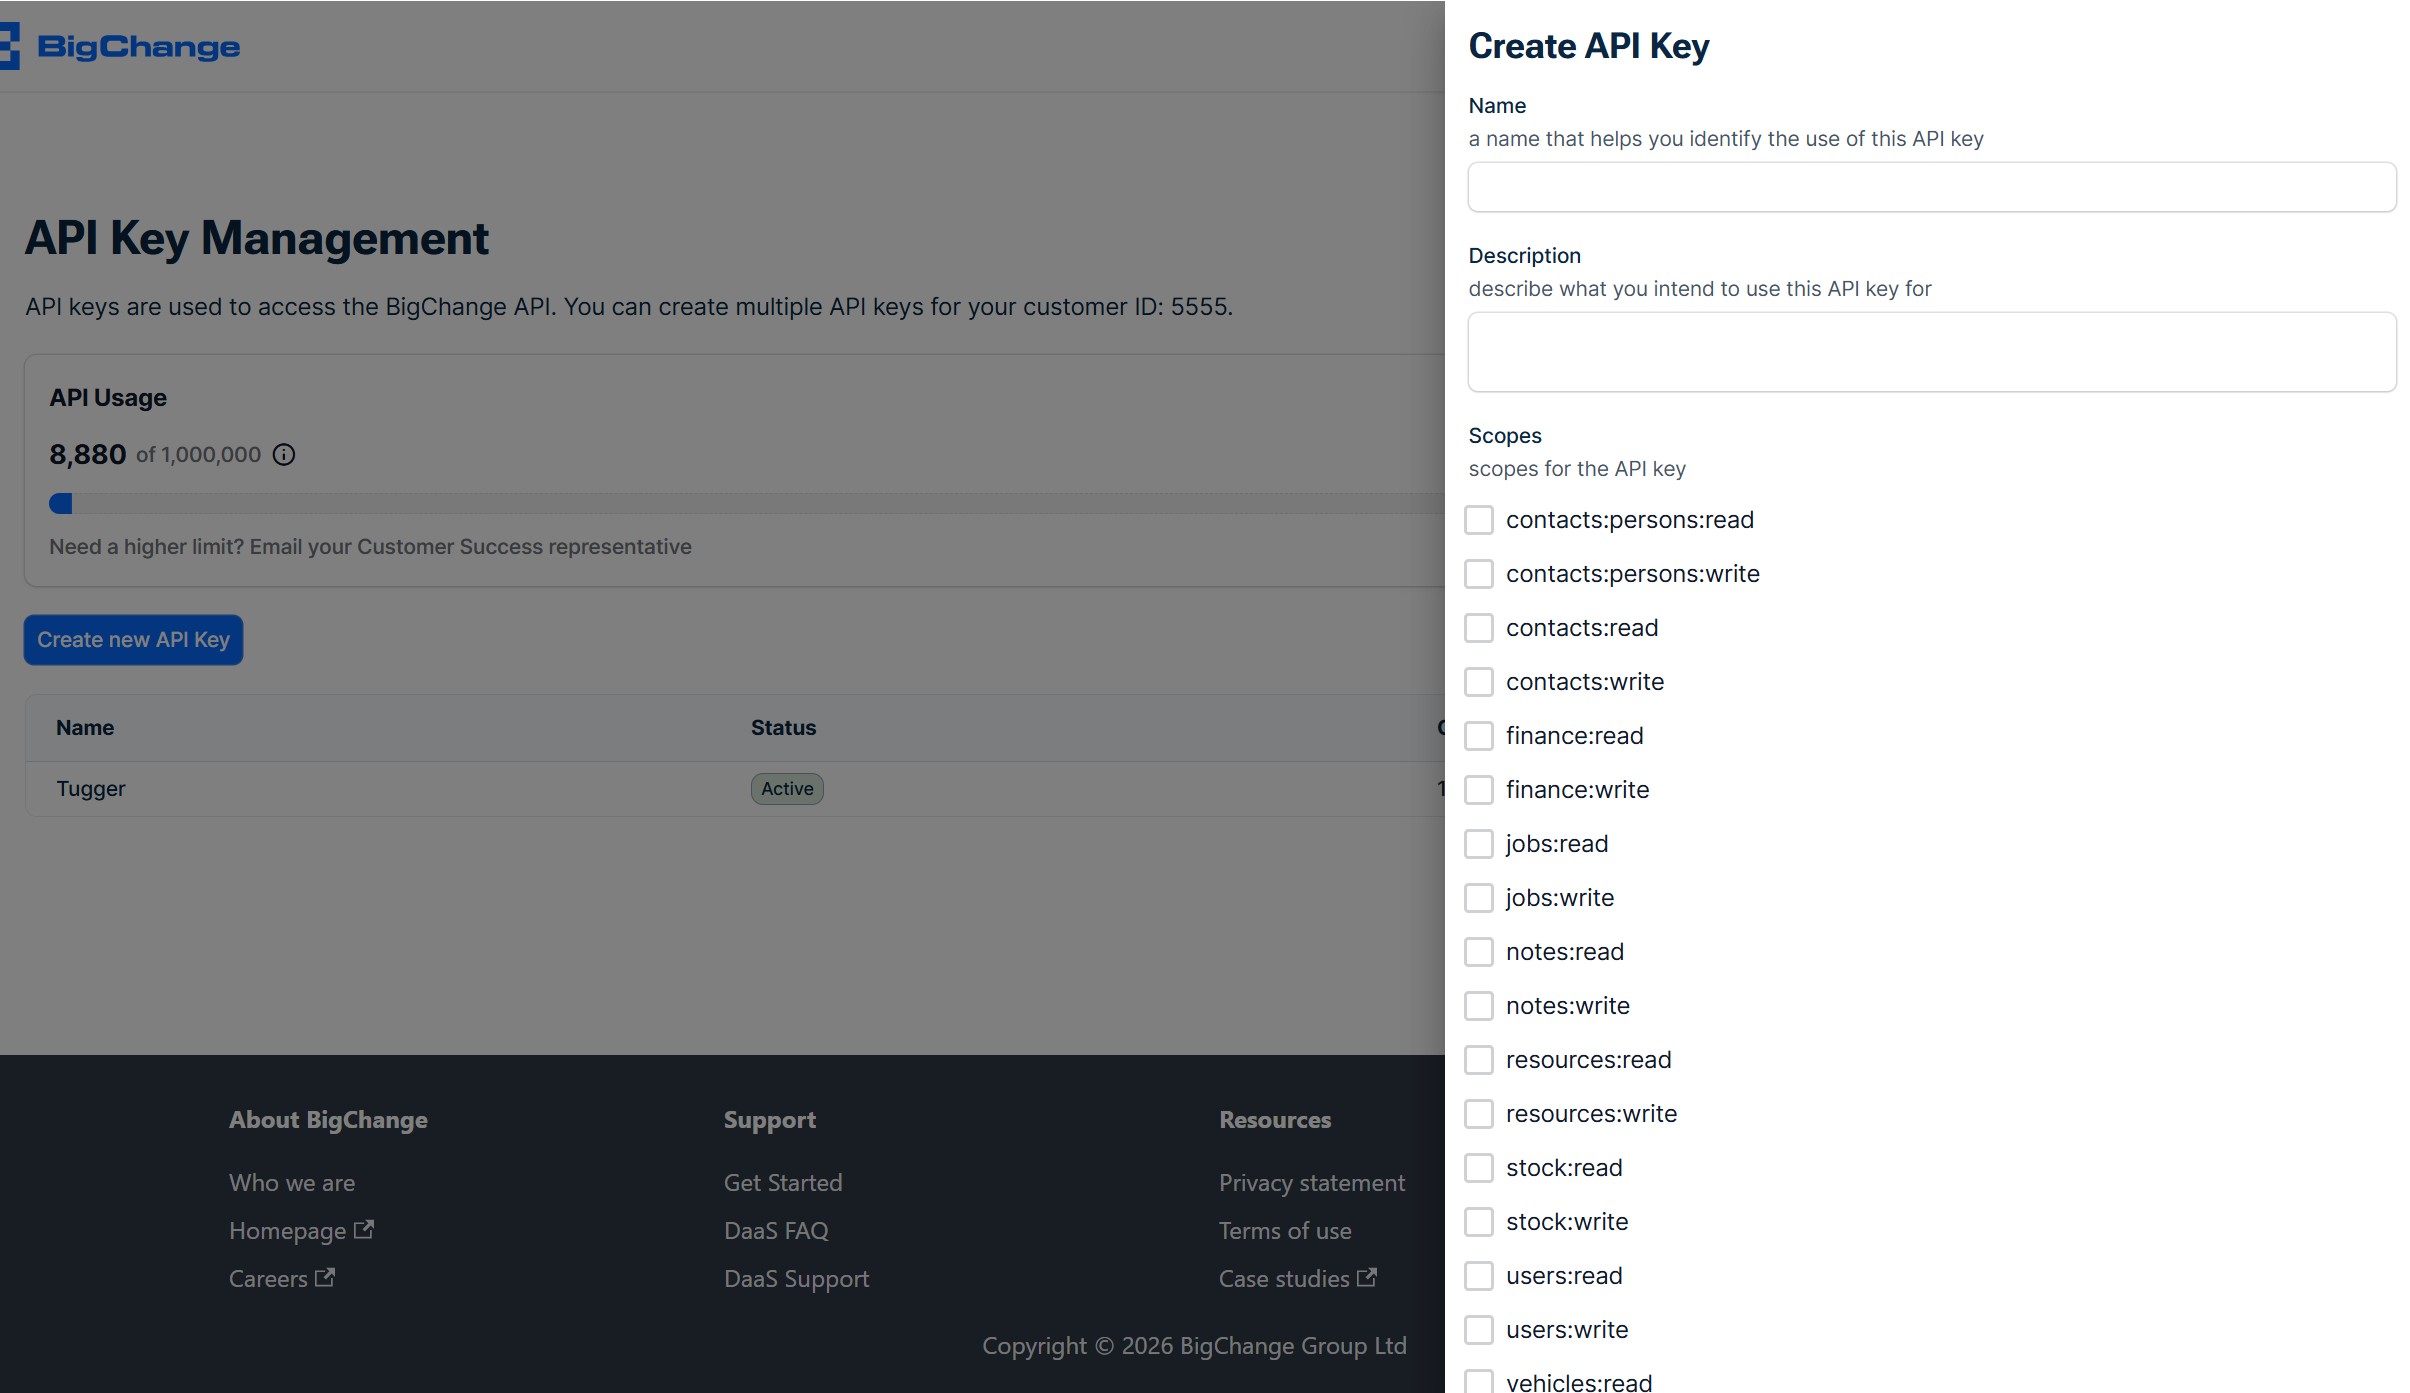

- contacts:persons:read
- contacts:read
- finance:read
- jobs:read
- notes:read
- resources:read
- stock:read
- users:read
- vehicles:read
- webhooks:read
- worksheets:read
Important: Only select the :read scopes listed above. Do not select any :write scopes - Tugger only needs read access to your data.
- Click Register to create the key
Step 3: Get your Client ID and Client Secret
Once your API key is created, you need to generate credentials for it.
- On the API Key Management page, click the three-dot menu next to your new key
- Select Create new credentials

- On the panel that appears, click Create new credentials
- Your Client ID and Client Secret will be displayed

Important: Copy both values now using the copy buttons. The Client Secret will not be shown again once you leave this page. If you lose it, you can generate new credentials from the same menu, but you'll need to update them in Tugger too.
Step 4: Enter your credentials in Tugger
Return to the Tugger BigChange Connector Settings page you opened in Step 1.
- Paste your Customer ID into the Customer Id field
- Paste your Client ID into the Client Id field
- Paste your Client Secret into the Client Secret field
- Click Save Settings
Tugger will verify the connection. If the credentials are accepted, you'll move on to the next stage.
Step 5: Your first sync
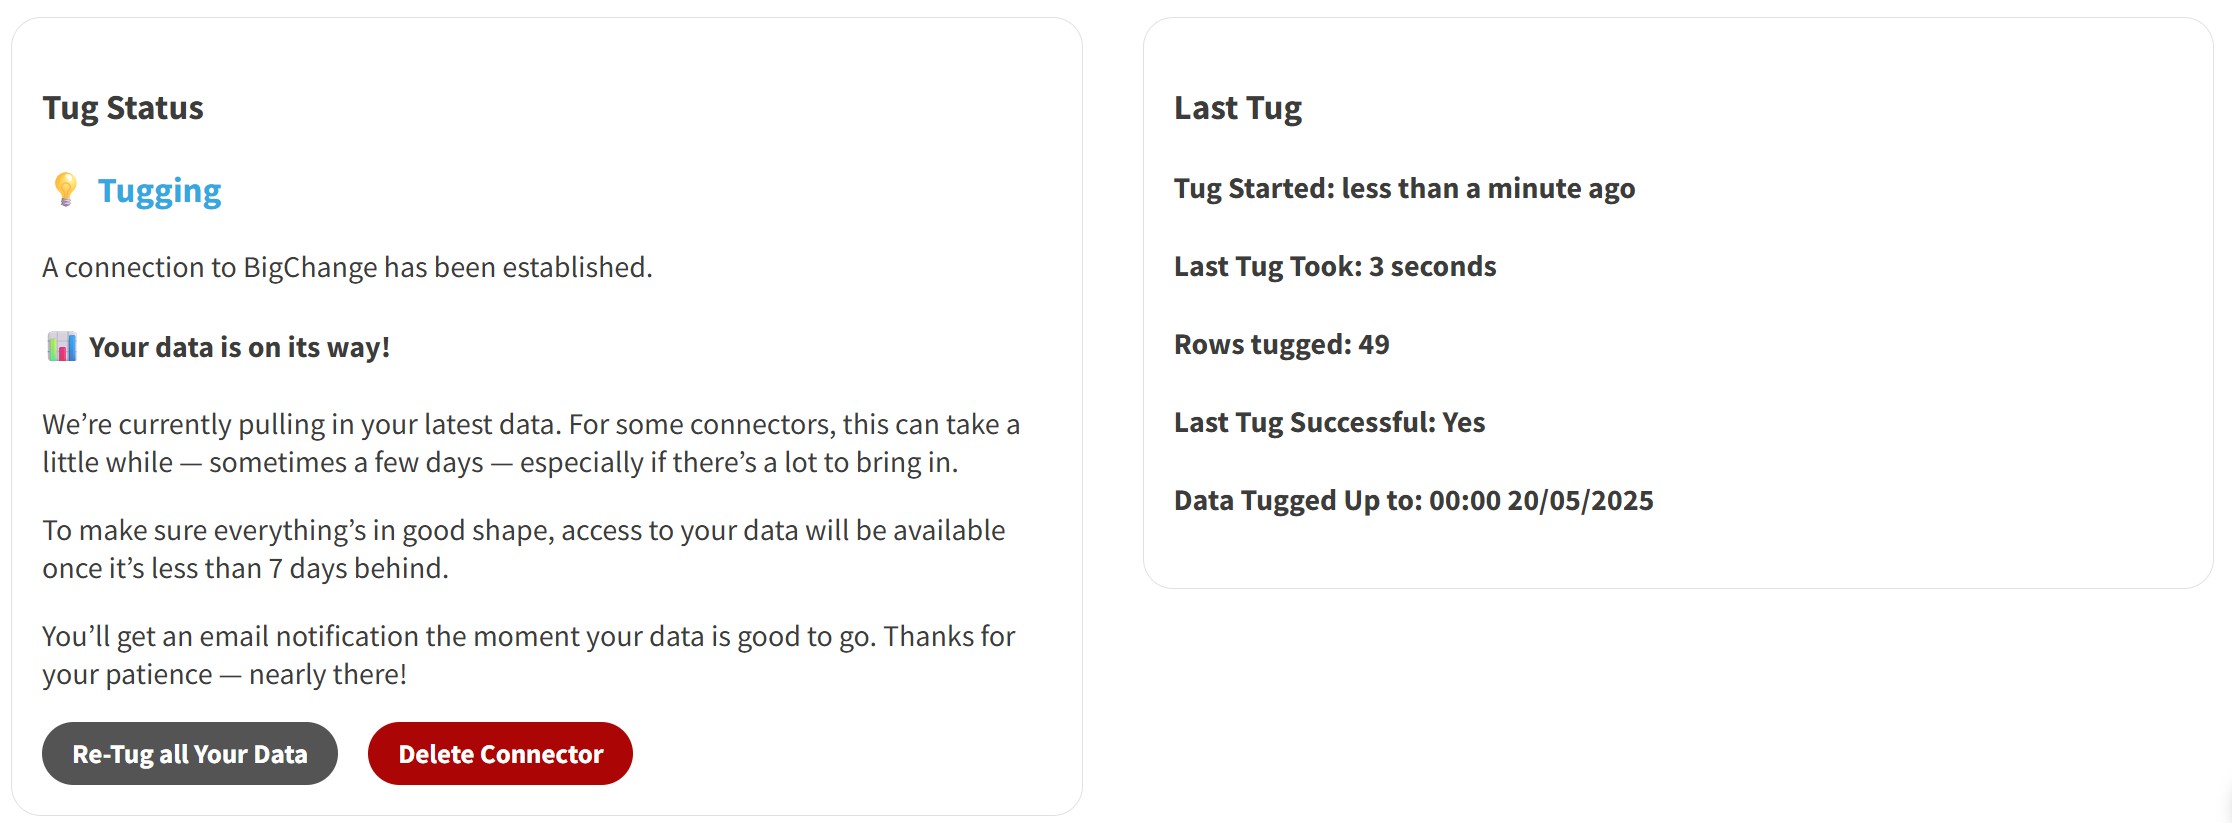
Once setup is complete, Tugger will begin pulling your BigChange data. You'll see the status on the Summary page.
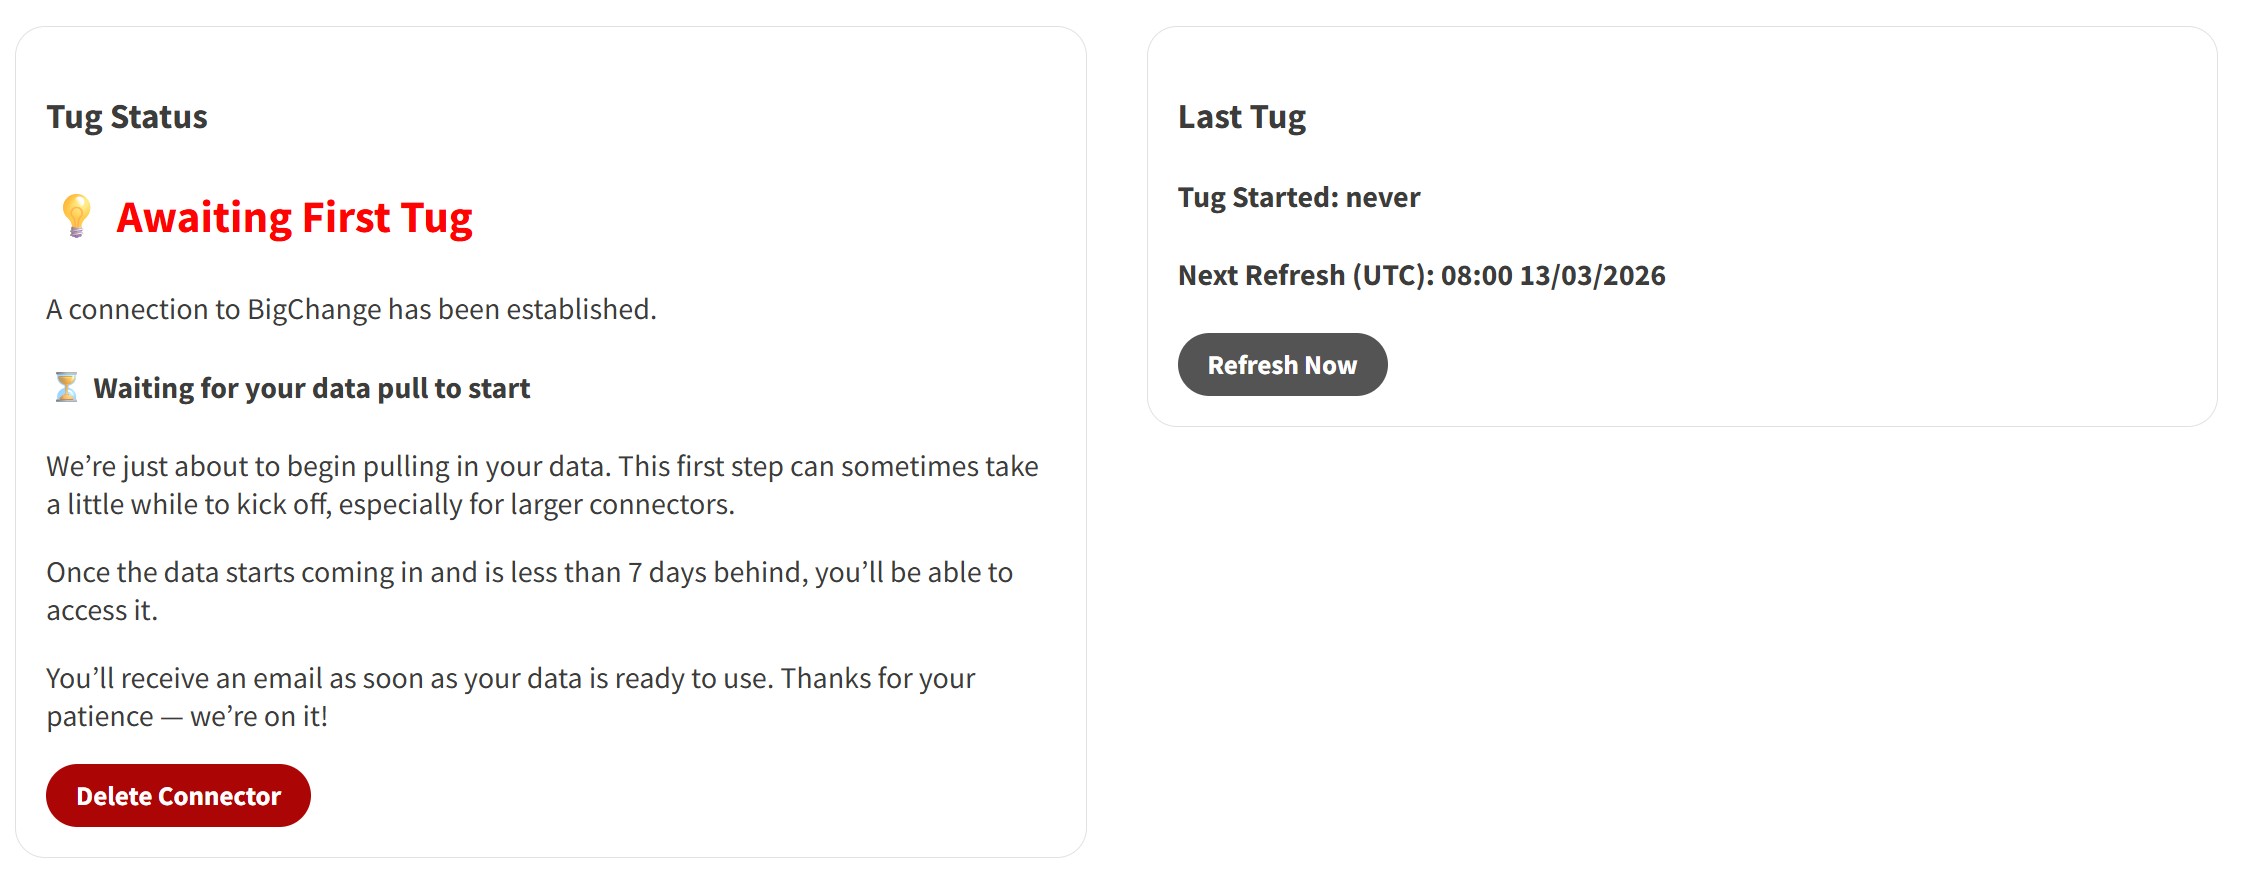
Depending on how far back your data start date goes, the first sync can take anywhere from a few minutes to longer. You can check progress on the Summary page - once it starts pulling data you'll see the status change to Tugging, with a row count updating as data comes in.
After that, Tugger syncs your data automatically every day at 08:00 UK time by default. You can change this - see Managing Your Sync Schedule.
You'll receive an email once your data is ready. The reporting options will then appear in Tugger and you can start building reports or using AI Insights.
What's next?
Once you've received the email confirming your data is ready:
Reporting
- Connect Power BI Desktop to Tugger - build reports using your BigChange data
- Connect Tableau to Tugger
- Export to Excel
AI Insights
- What is Tugger AI Insights? - ask questions about your BigChange data in plain English
- Connect Tugger to Claude | ChatGPT)
Manage your sync schedule
- Managing Your Sync Schedule - change when and how often Tugger pulls your data
Need help? Contact the Tugger team - we're happy to help you get set up.