This guide walks you through connecting Tugger AI Insights to ChatGPT (by OpenAI), so you can ask questions about your business data in natural language.
Setup takes around 5 minutes.
What you'll need
- A Tugger account with at least one active connector that has completed its first sync
- MCP access enabled by your Tugger admin - by default, users have no MCP access. Your admin needs to grant you access on the User Permissions tab in MCP Configuration before you can connect.
- A ChatGPT account with a Plus, Pro, Team, or Enterprise plan. MCP servers are not available on the free plan.
Step 1: Find your MCP server URL in Tugger
Note: This step requires administrator access. If you're not an admin, ask your Tugger admin for the server URL.
- Log in to Tugger at tuggerapp.com
- Click MCP Configuration in the menu
- On the Setup Guides tab, you'll see your Server URL at the top of the page
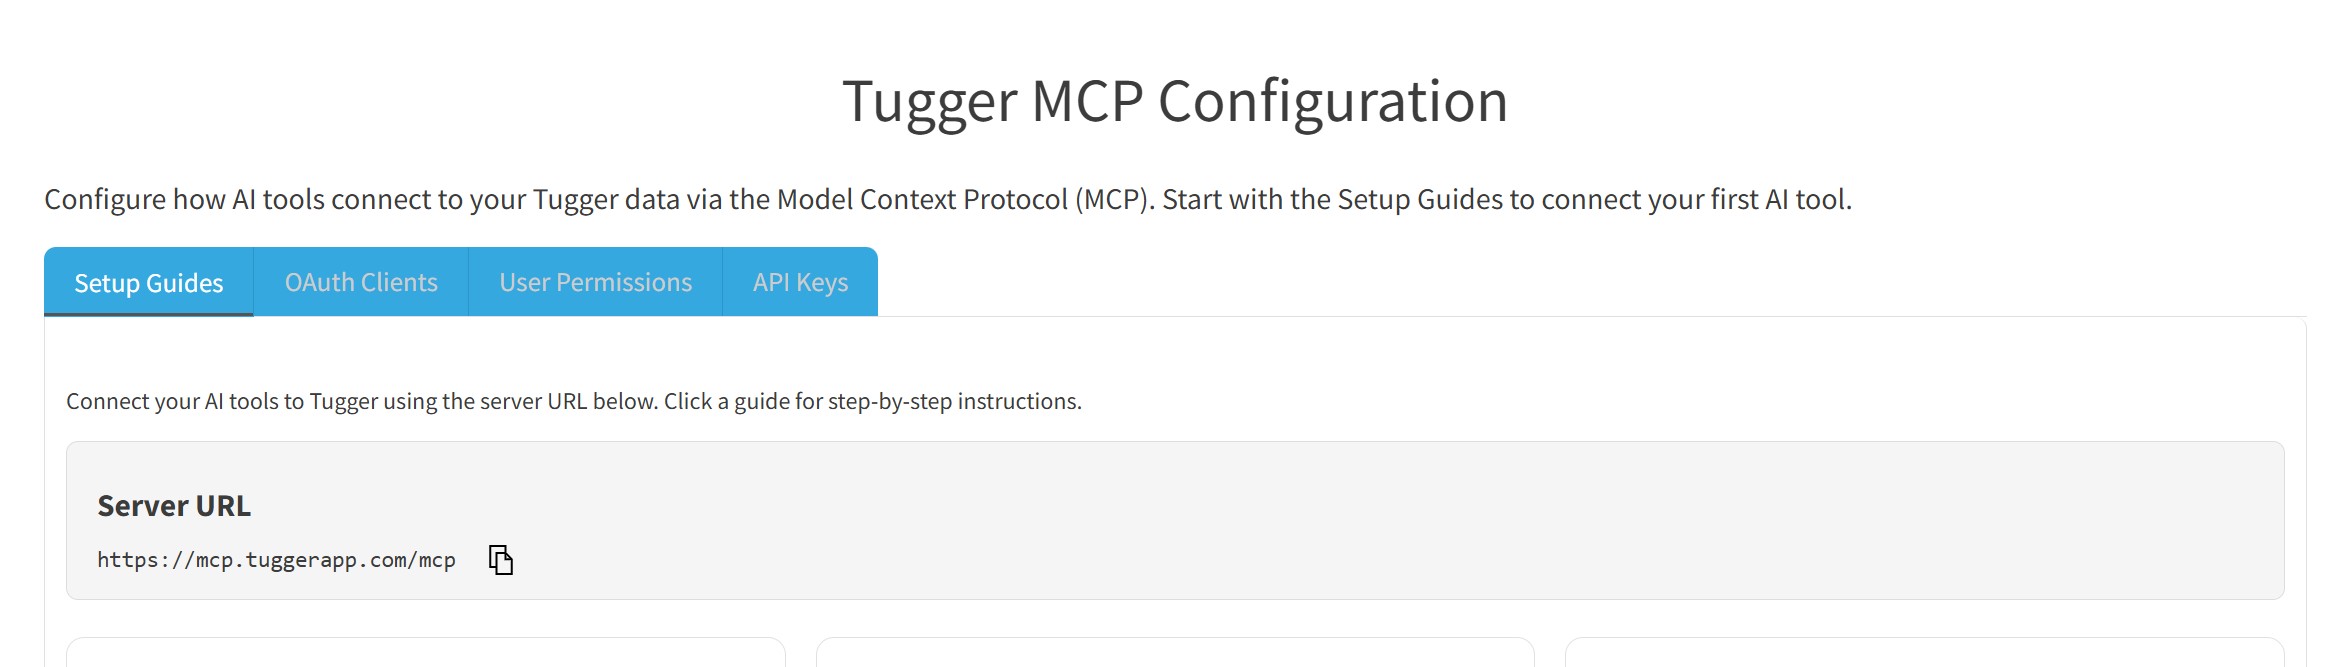
- Click the copy button next to the URL to copy it to your clipboard
Step 2: Open your ChatGPT settings
- Open ChatGPT and sign in
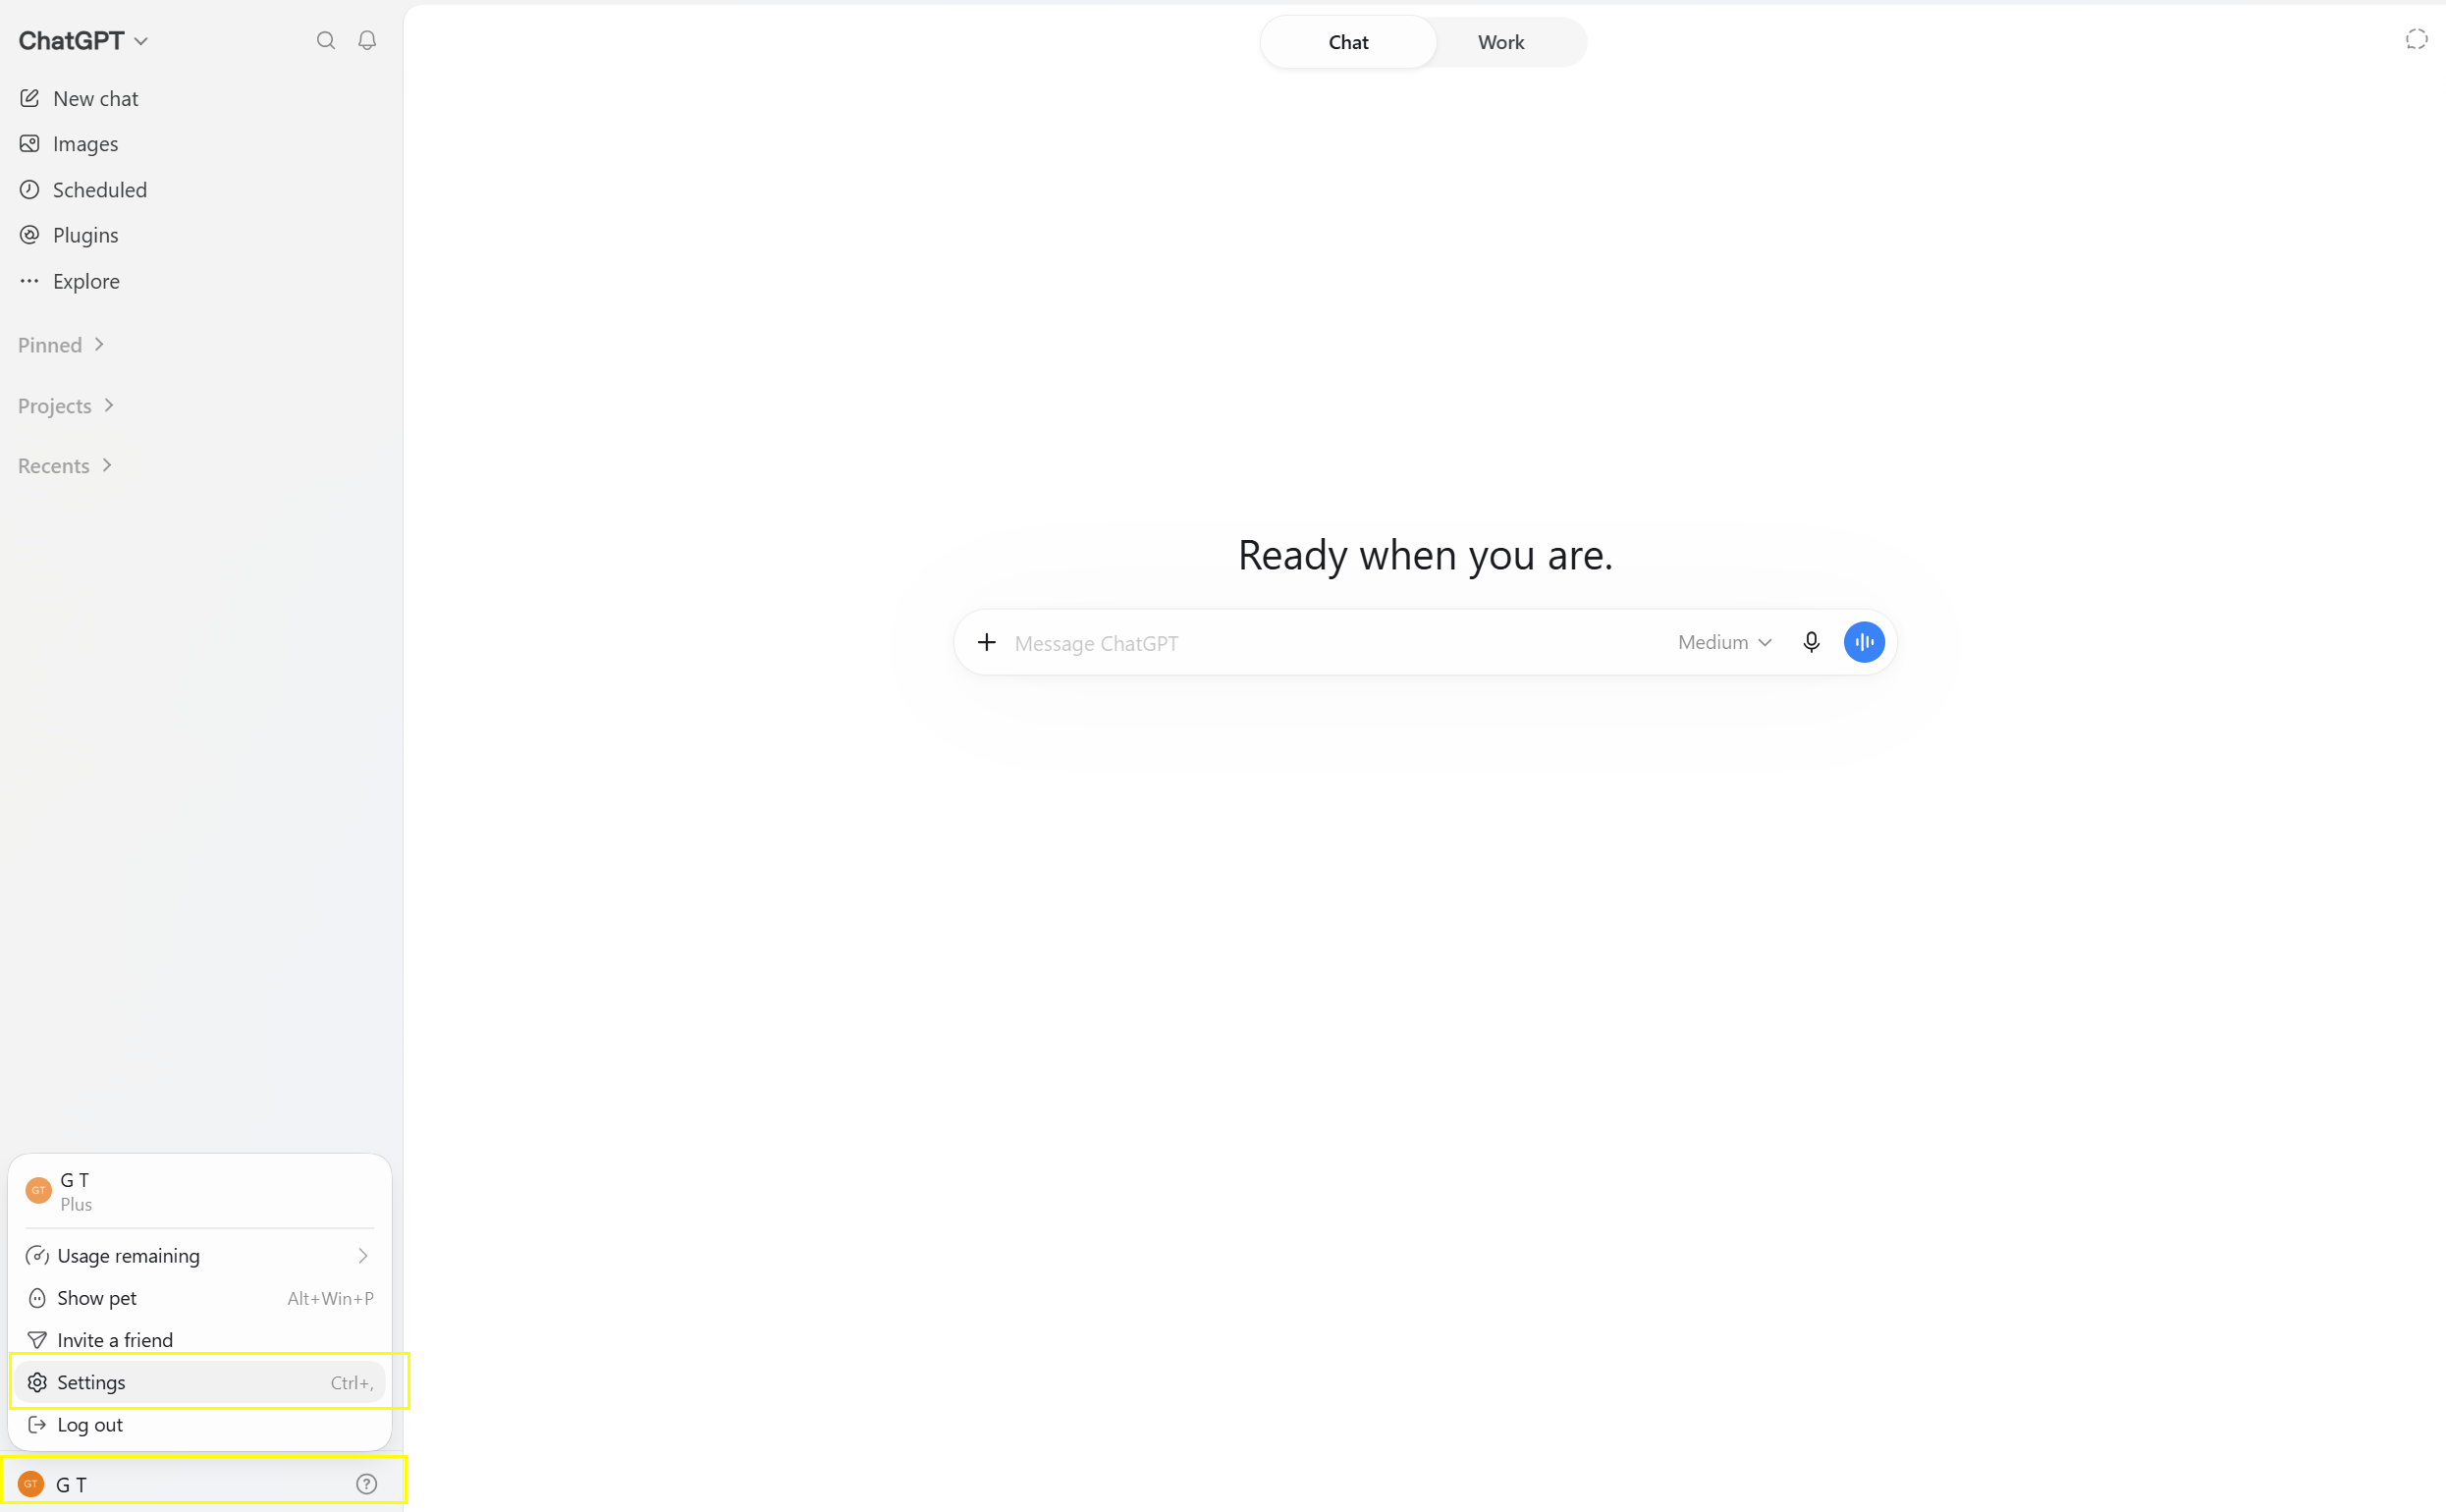
- Click your profile name at the bottom of the left sidebar
- Click Settings
Step 3: Add Tugger as an MCP server
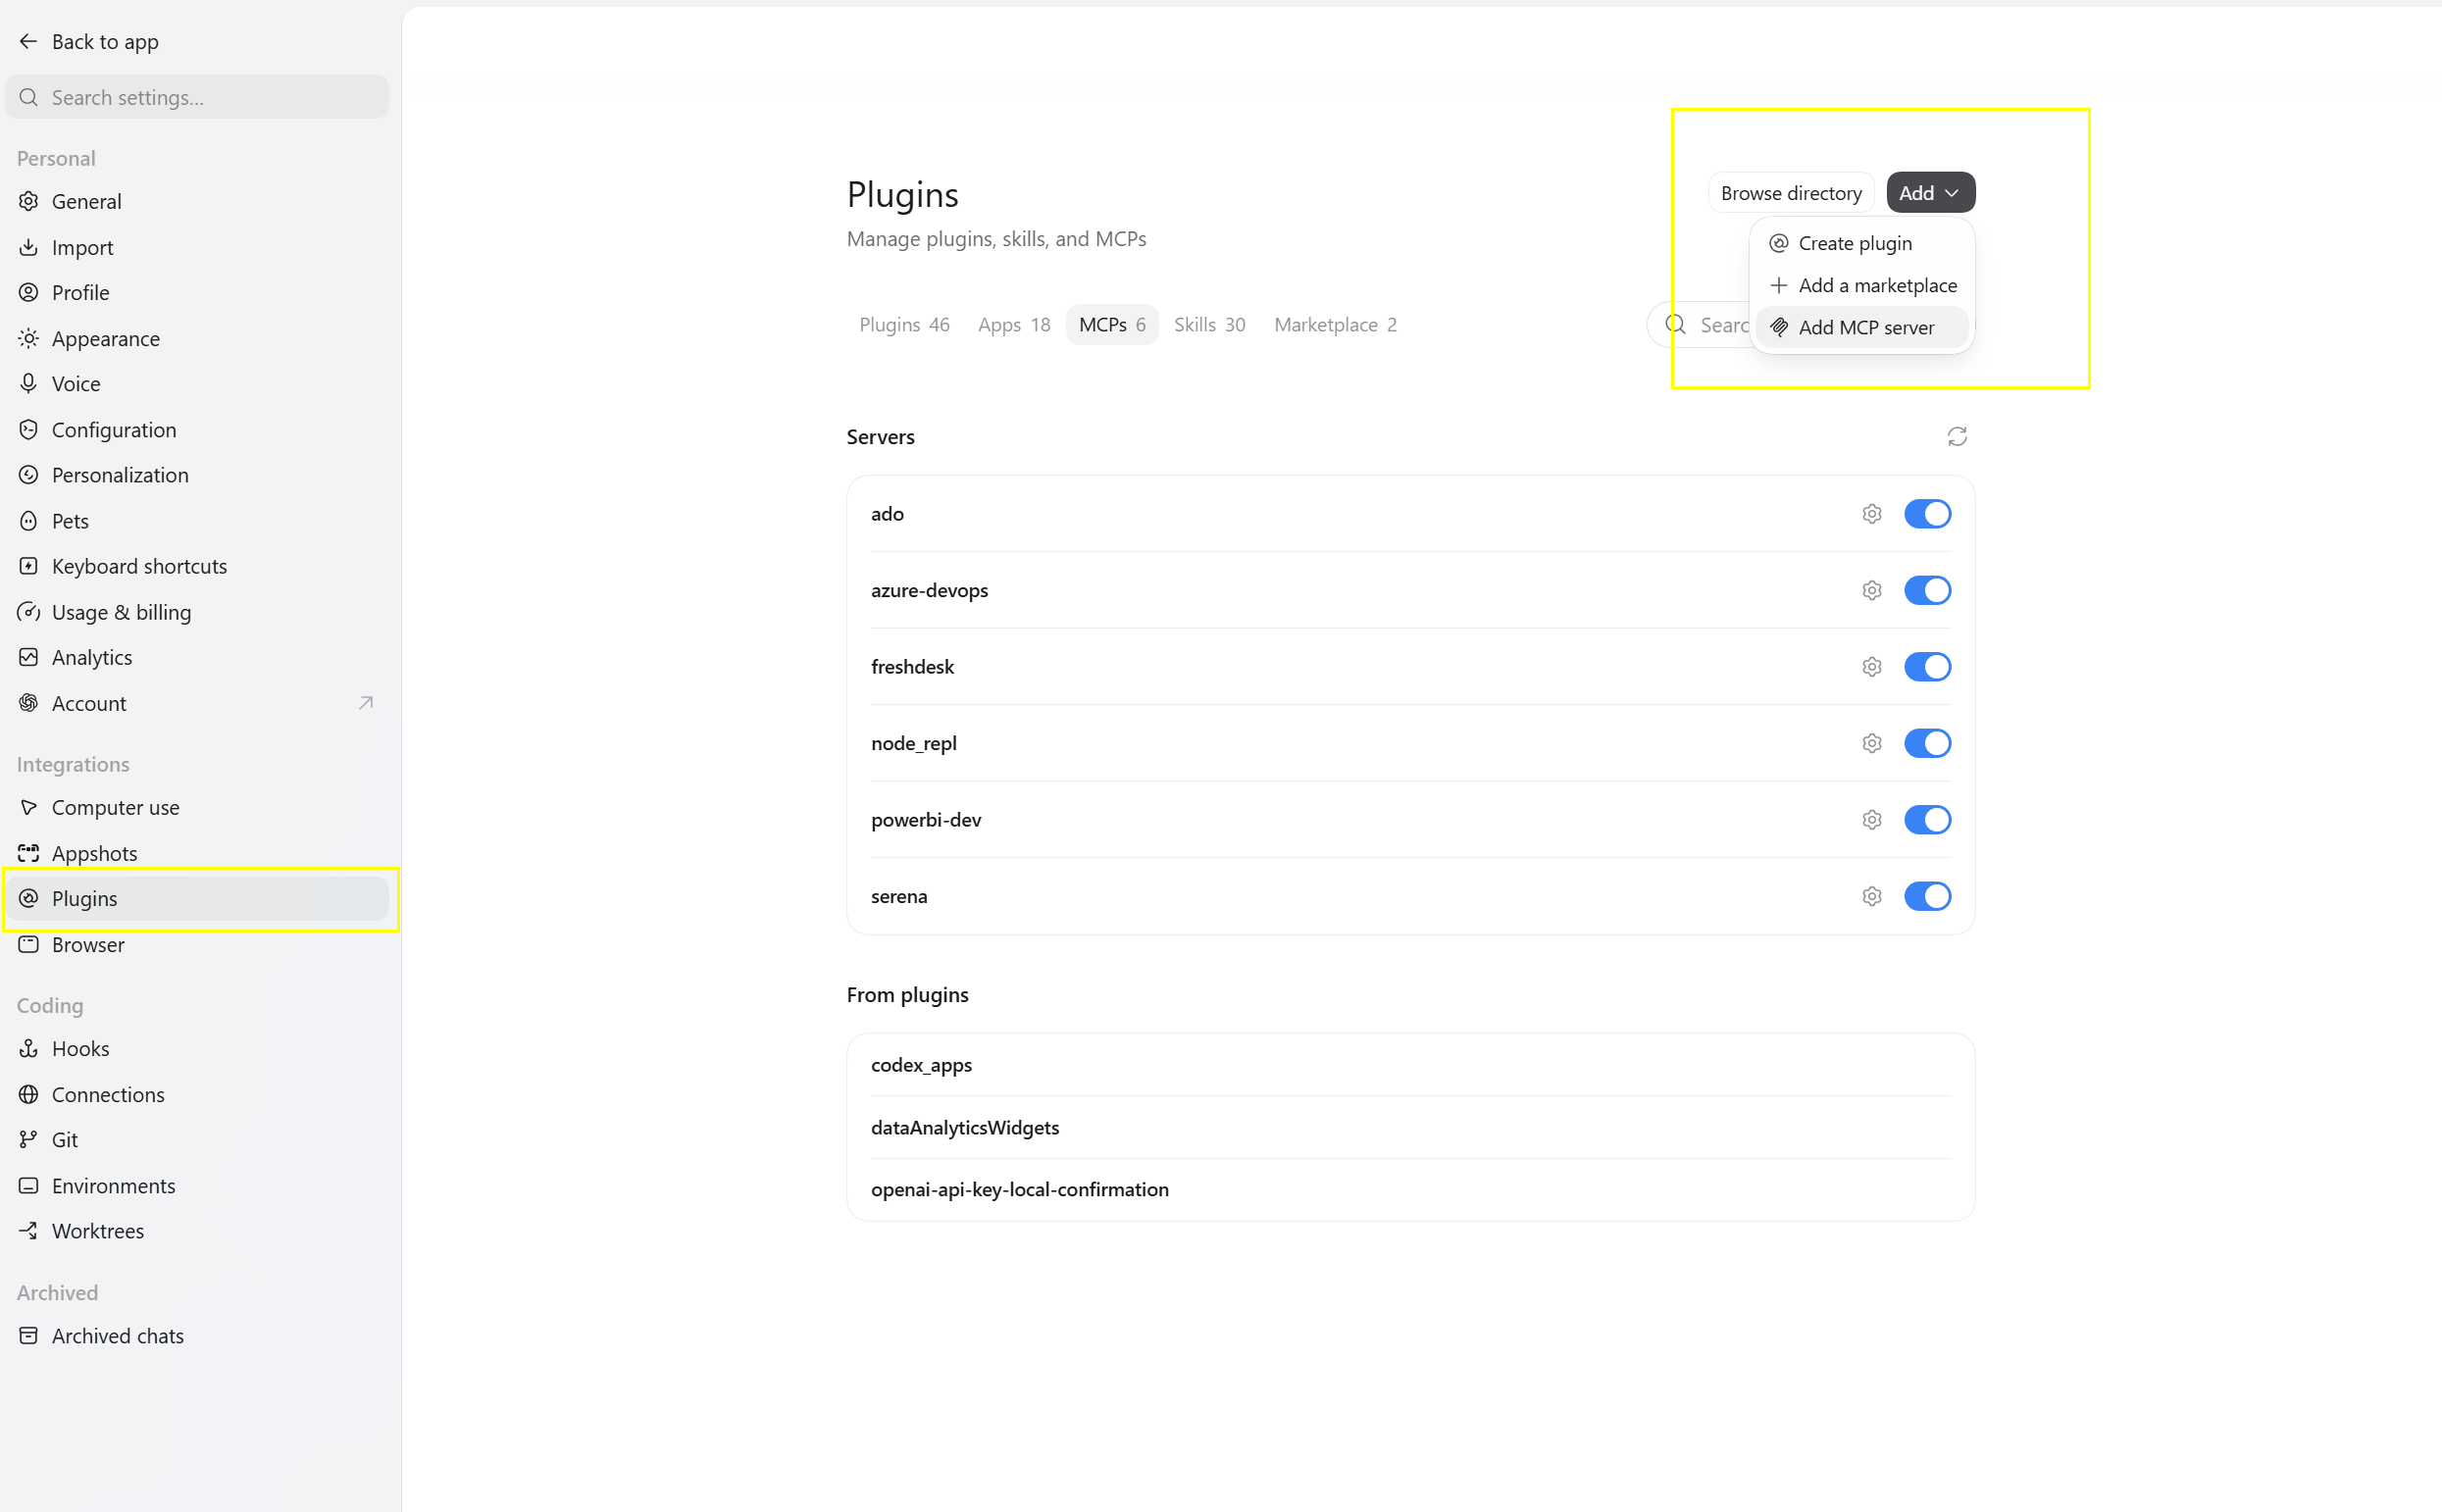
- In the left sidebar of Settings, under Integrations, click Plugins
- Select the MCPs tab
- Click Add (top right), then click Add MCP server
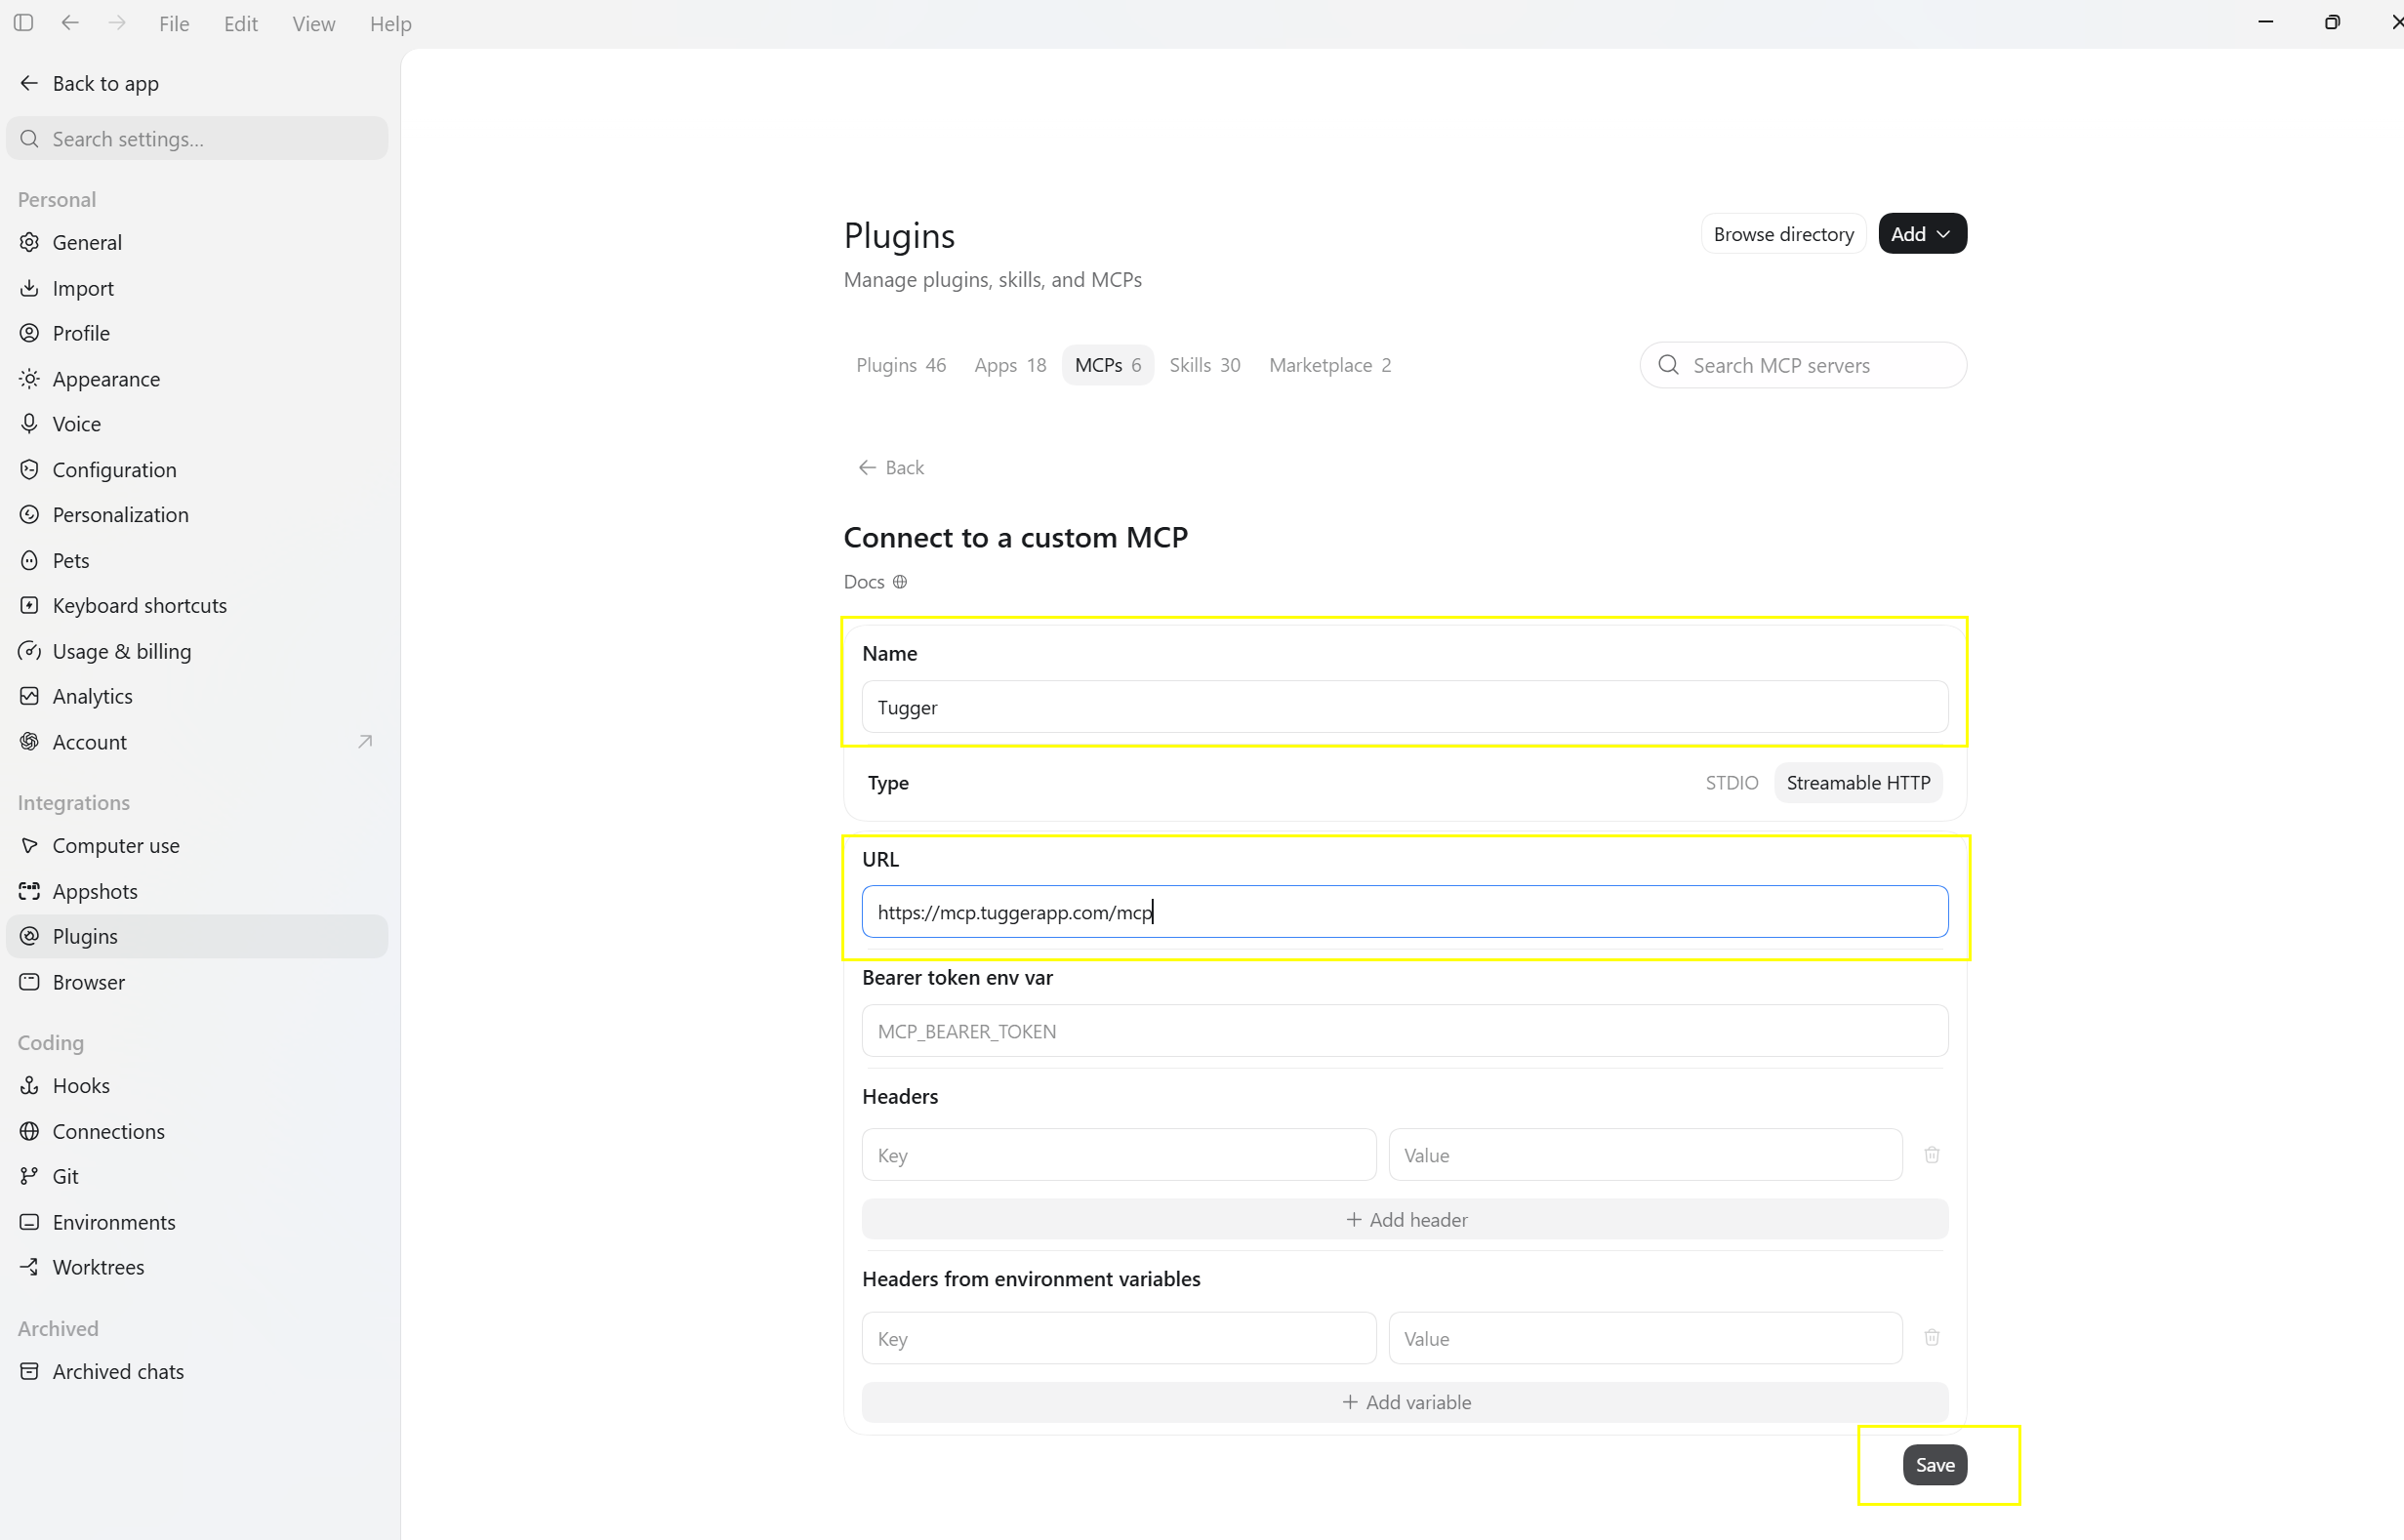
- On the Connect to a custom MCP screen, fill in the following:
- Name: Tugger
- Type: Streamable HTTP
- URL: paste the Server URL you copied from Tugger
- Leave Bearer token env var, Headers, and Headers from environment variables empty. Tugger uses OAuth, so no token or header is needed here.
- Click Save
Step 4: Authenticate with Tugger
Once saved, Tugger appears in your list of MCP servers with an Authenticate button.
- Click Authenticate next to the Tugger server

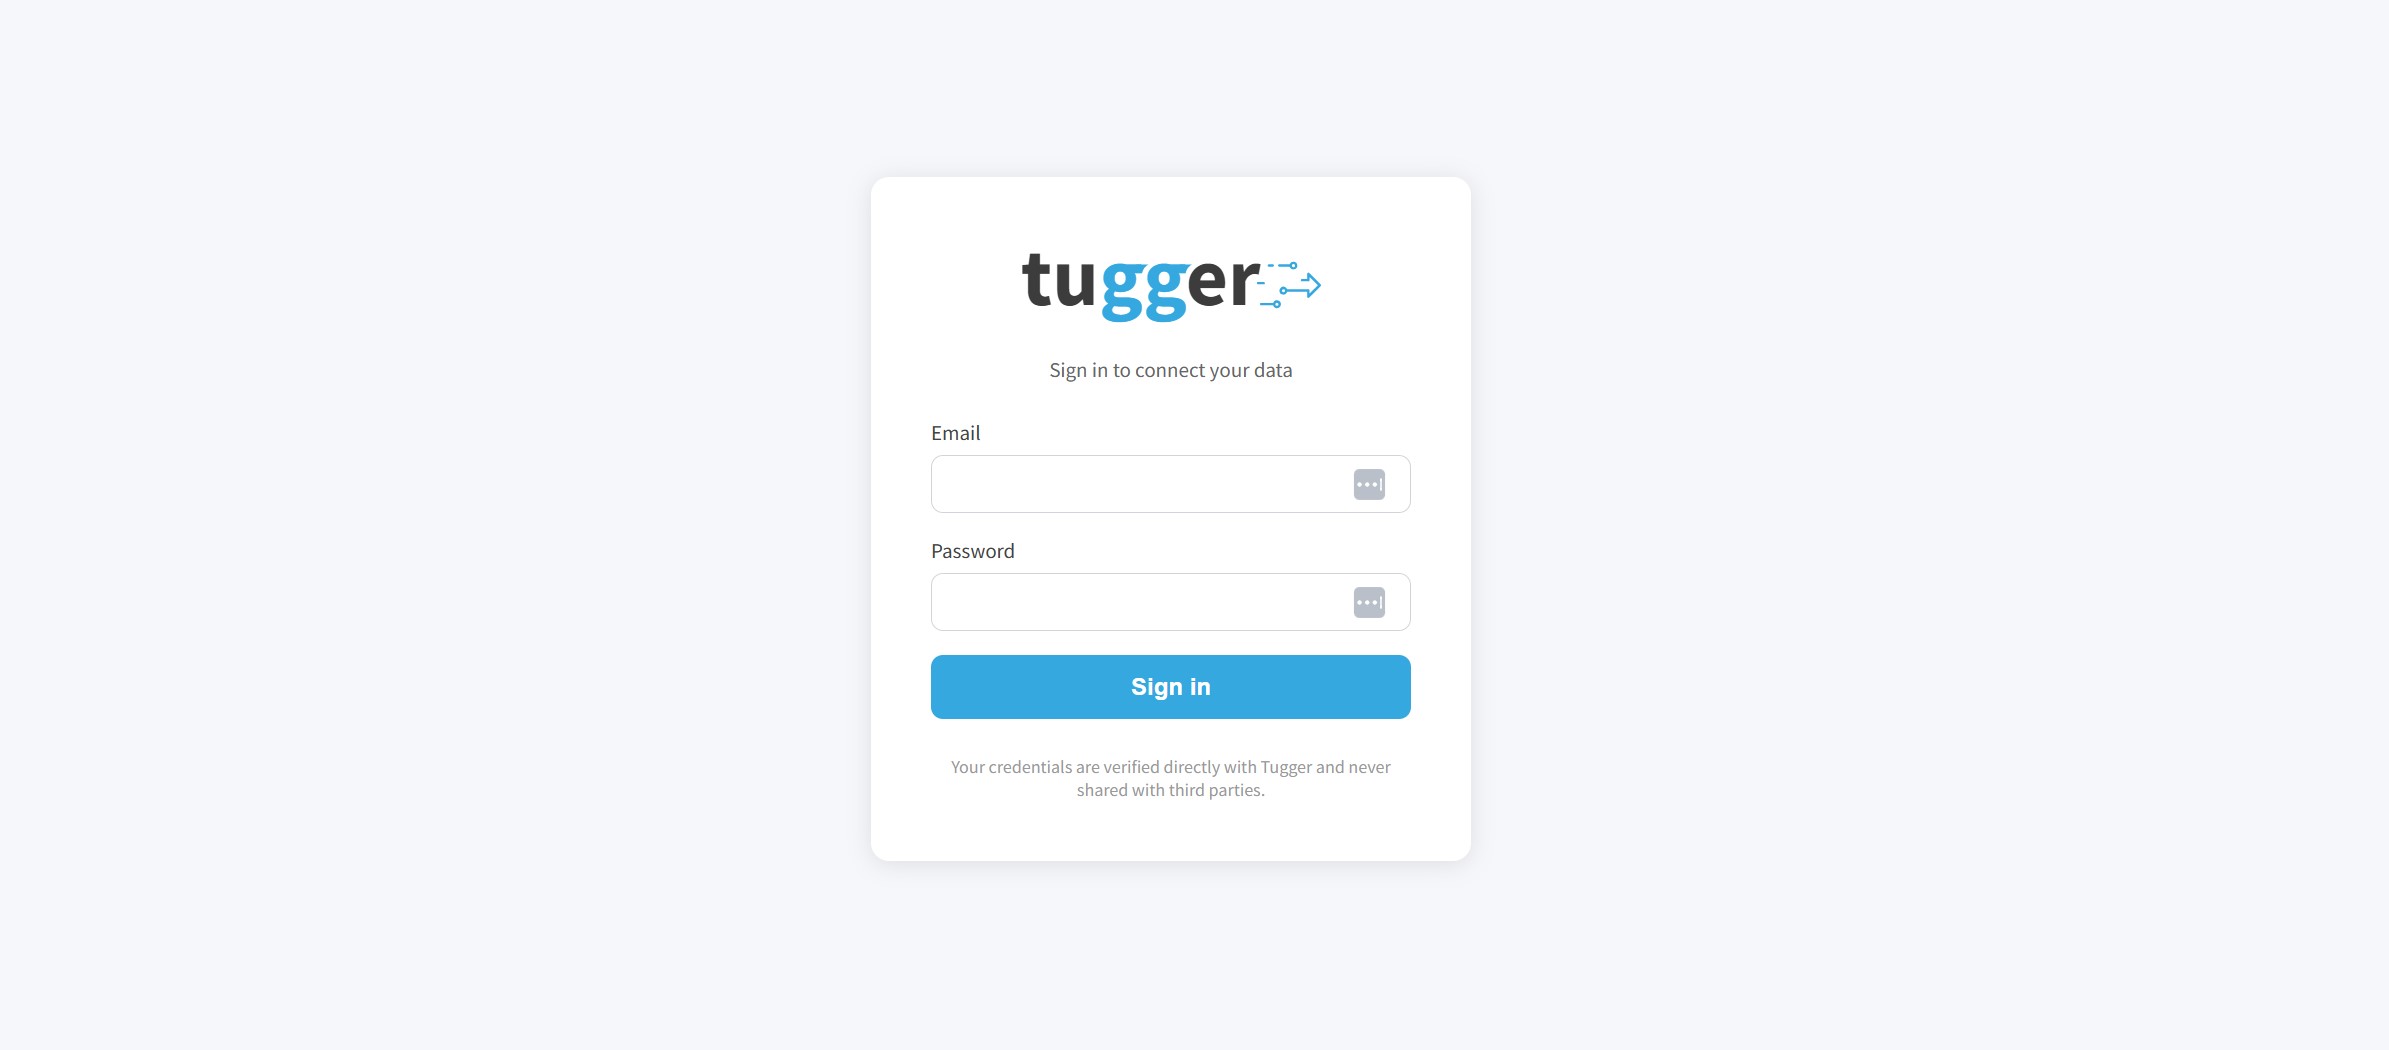
- You'll be taken to the Tugger sign-in screen. Log in with your Tugger credentials and approve the request
- You'll be returned to ChatGPT. The Authenticate button disappears and the toggle next to Tugger stays switched on, which means the connection is live
Note: Your Tugger admin controls which connectors you can access through AI Insights. If you can't see data from a particular connector, ask your admin to check your permissions in MCP Configuration.
Step 5: Start asking questions
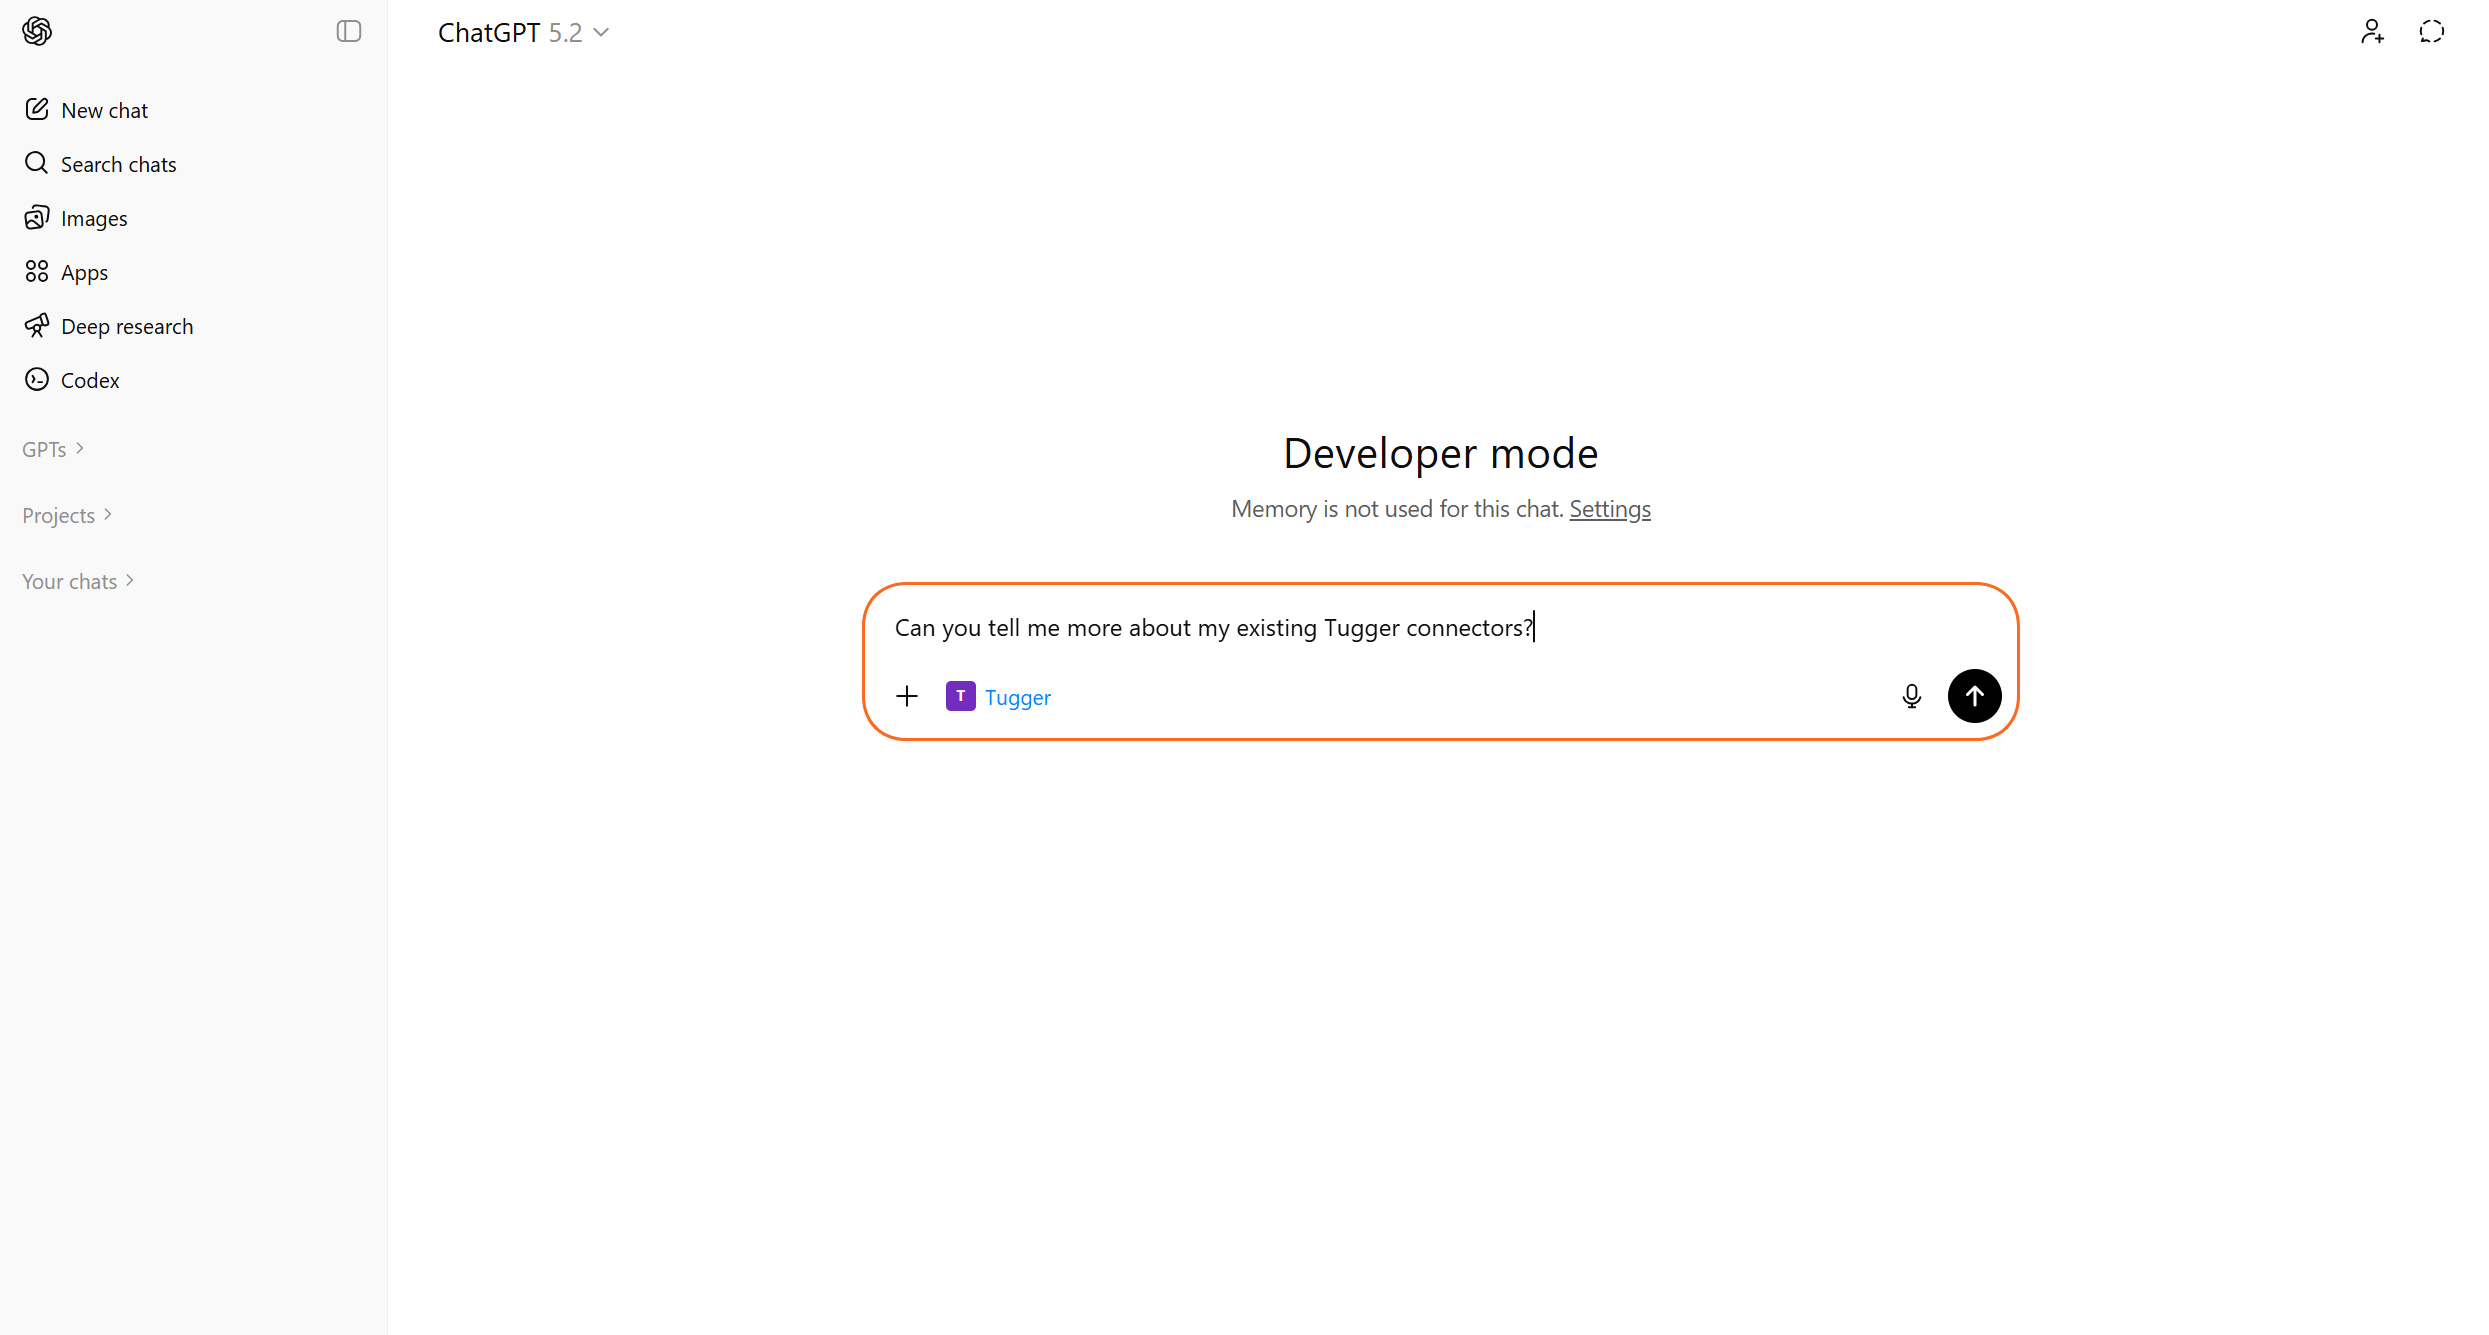
You're all set. Go back to the chat and start asking about your data.
Try one of these to get started:
- "What connectors do I have access to in Tugger?" - a good first question to confirm what data is available
- "Show me a summary of my data" - lets the AI explore what's there
- "What are my top 10 customers by revenue?" - if you have an accounting connector like Xero or QuickBooks
For more example prompts and tips on getting the best answers, see Tips for Getting the Best Results from AI Insights.
Troubleshooting
Tugger does not appear in the MCP server list
- Check that you completed Step 3 and the server was saved successfully. Go to Settings > Plugins > MCPs and look under Servers.
Connection failed or timed out
- Double-check the Server URL in your Tugger MCP Configuration and make sure it matches the URL you entered. You can review it by clicking the settings (cog) icon next to the Tugger server.
- Make sure the Type is set to Streamable HTTP, not STDIO.
The Authenticate button is still showing
- Authentication has not completed. Click Authenticate again and make sure you finish the Tugger sign-in and approve the request.
- If your session has expired, ChatGPT will show the Authenticate button again. Simply re-authenticate.
Connected but no data showing
- Check that the toggle next to the Tugger server is switched on.
- Check that at least one connector has completed its first sync in Tugger.
- Ask your Tugger admin to check your access level on the User Permissions tab in MCP Configuration. By default, users have No Access and need to be granted permission.
Getting unexpected or incomplete results
- Try being more specific in your questions - see Tips for Getting the Best Results from AI Insights.
- Make sure the connector containing the data you are asking about is included in your MCP access permissions.
Need to disconnect or reconnect?
- In ChatGPT: go to Settings > Plugins > MCPs, click the settings (cog) icon next to Tugger, and remove the server. Then follow this guide again to reconnect. To pause access without removing it, switch the toggle off instead.
- In Tugger: your admin can deactivate the OAuth client from the OAuth Clients tab in MCP Configuration.
Related articles: