This guide shows you how to load your Tugger data into Power BI Desktop. The process is the same regardless of which connector you're using (Xero, HubSpot, Simpro, etc.).
Many connectors come with pre-built report templates to get you started quickly. If your connector doesn't include a
, you can still connect Power BI to your data using OData - both options are covered below.
Before you start
Make sure you have the following:
- Your first sync must be complete - you'll have received an email from Tugger confirming your data is ready. The reporting tab will only appear in Tugger once this is done.
- Power BI Desktop installed - available free from the Microsoft Store or as a direct download (choose the 64-bit version).
- Power BI Service (optional) - you'll need this if you want to share reports with others in your organisation. It can be added to a Microsoft 365 account and usually has a 60-day free trial. See pricing here. You don't need it just to view reports on your own PC.
Step 1: Find your connection details in Tugger
To connect Power BI to your Tugger data, you'll need your OData URL, Username, and Password. There are two places to find these in Tugger.
Option 1: Report Credentials page (quickest)
If you just need your connection details and already know which template to use (or aren't using a template):
- Log in to Tugger at tuggerapp.com
- Navigate to your connector
- Click Report Credentials
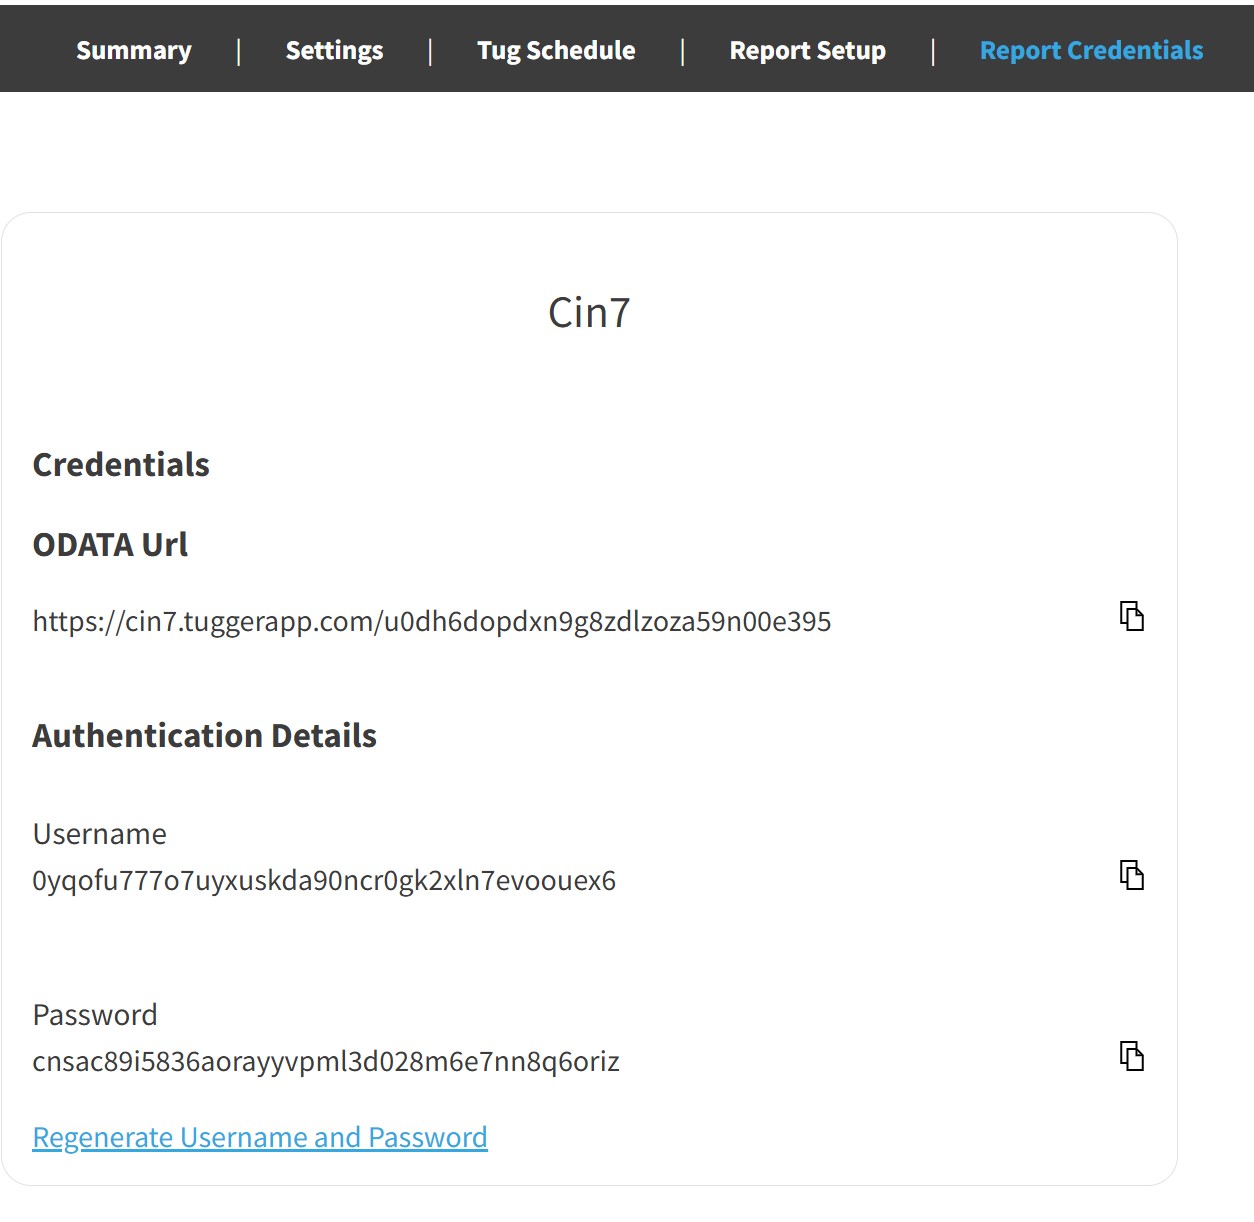
You'll see your OData URL, Username, and Password, each with a copy button. Keep this page open for later steps.
Option 2: Report Setup wizard (recommended for first-time setup)
The Report Setup wizard walks you through the full process, including downloading templates and entering parameters.
- Log in to Tugger at tuggerapp.com
- Navigate to your connector
- Click Report Setup
- Select Power BI
.jpg)
The wizard will guide you through the following steps:
- OData URL and template parameters (if your connector includes a template) - see Step 2A below
- Credentials and authentication instructions - including screenshots of the Power BI authentication dialogue showing exactly what to select
Click Finish Report Setup when you're done.
Tip: Use the copy buttons next to each credential to avoid typing errors.
Step 2: Open your report in Power BI Desktop
Option A: Using a Tugger report template (recommended)
If your connector includes report templates, you can download them from the Report Setup wizard or the Report Setup page. Templates are .pbit files that come pre-built with visuals, calculations, and report pages.
- Open the downloaded .pbit file - either click it from your browser's downloads, or find it in your Downloads folder and double-click it. Power BI Desktop will launch automatically.
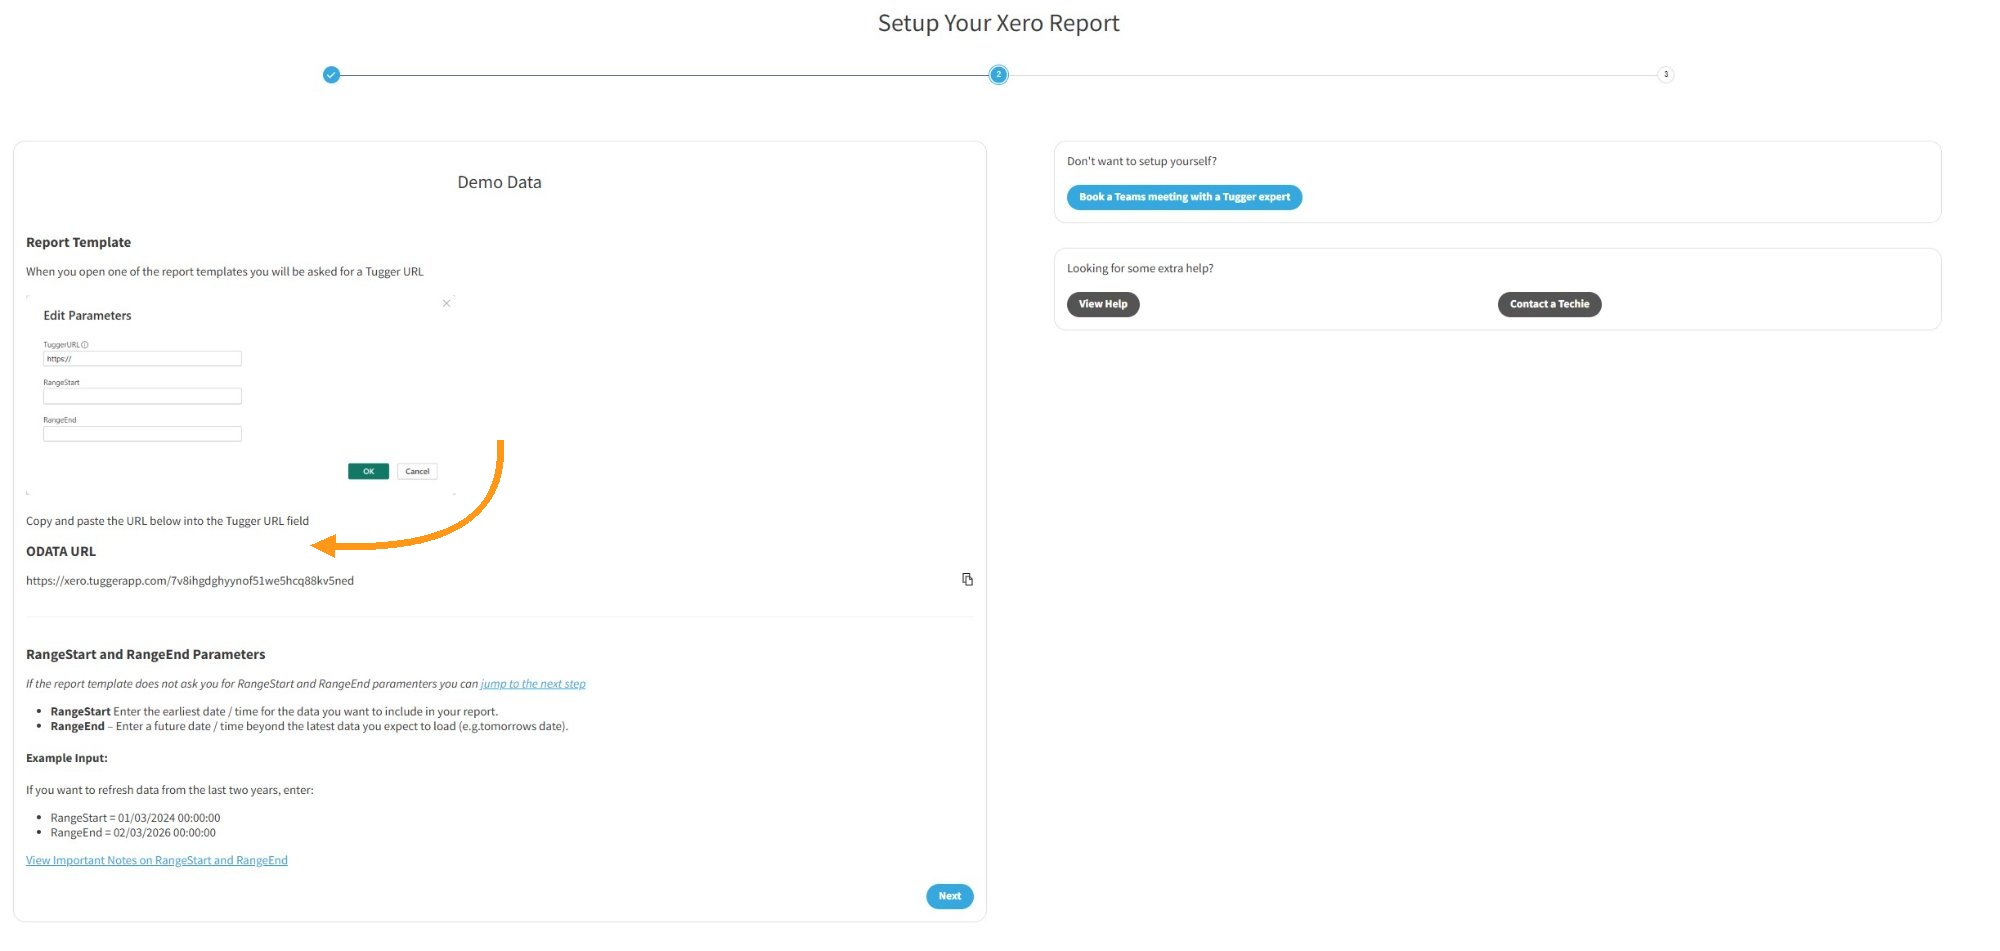
- You'll see a parameter screen. Paste the OData URL from Tugger into the TuggerURL field.
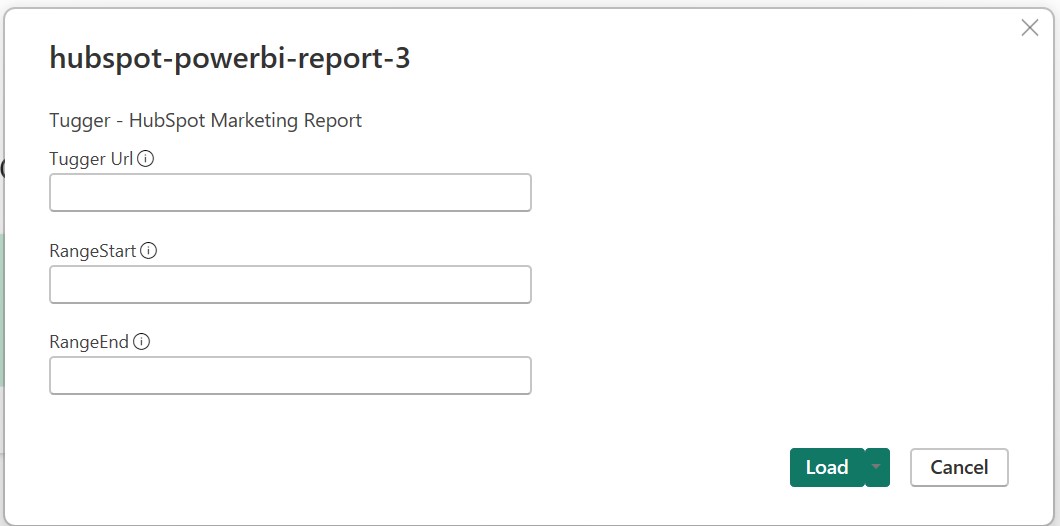
RangeStart and RangeEnd (if shown)
Some templates ask for date range parameters. If you don't see these fields, skip ahead and click OK.
If they are shown:
- RangeStart - enter the earliest date you want data from (e.g.
01/03/2024 00:00:00) - RangeEnd - enter a date in the future, after today (e.g.
02/03/2026 00:00:00)
Important:
- Use Date/Time format, not just a date
- Make sure the format matches your Power BI regional settings (File > Options and Settings > Options > Regional Settings)
- Don't set RangeEnd to today's date - always use a future date so new data isn't missed
- For faster loading while you're customising reports in Desktop, use a smaller date range. You can widen it later.
- Click OK
Option B: Connecting without a template
If your connector doesn't include a template, or you want to build your own report from scratch:
- Open Power BI Desktop
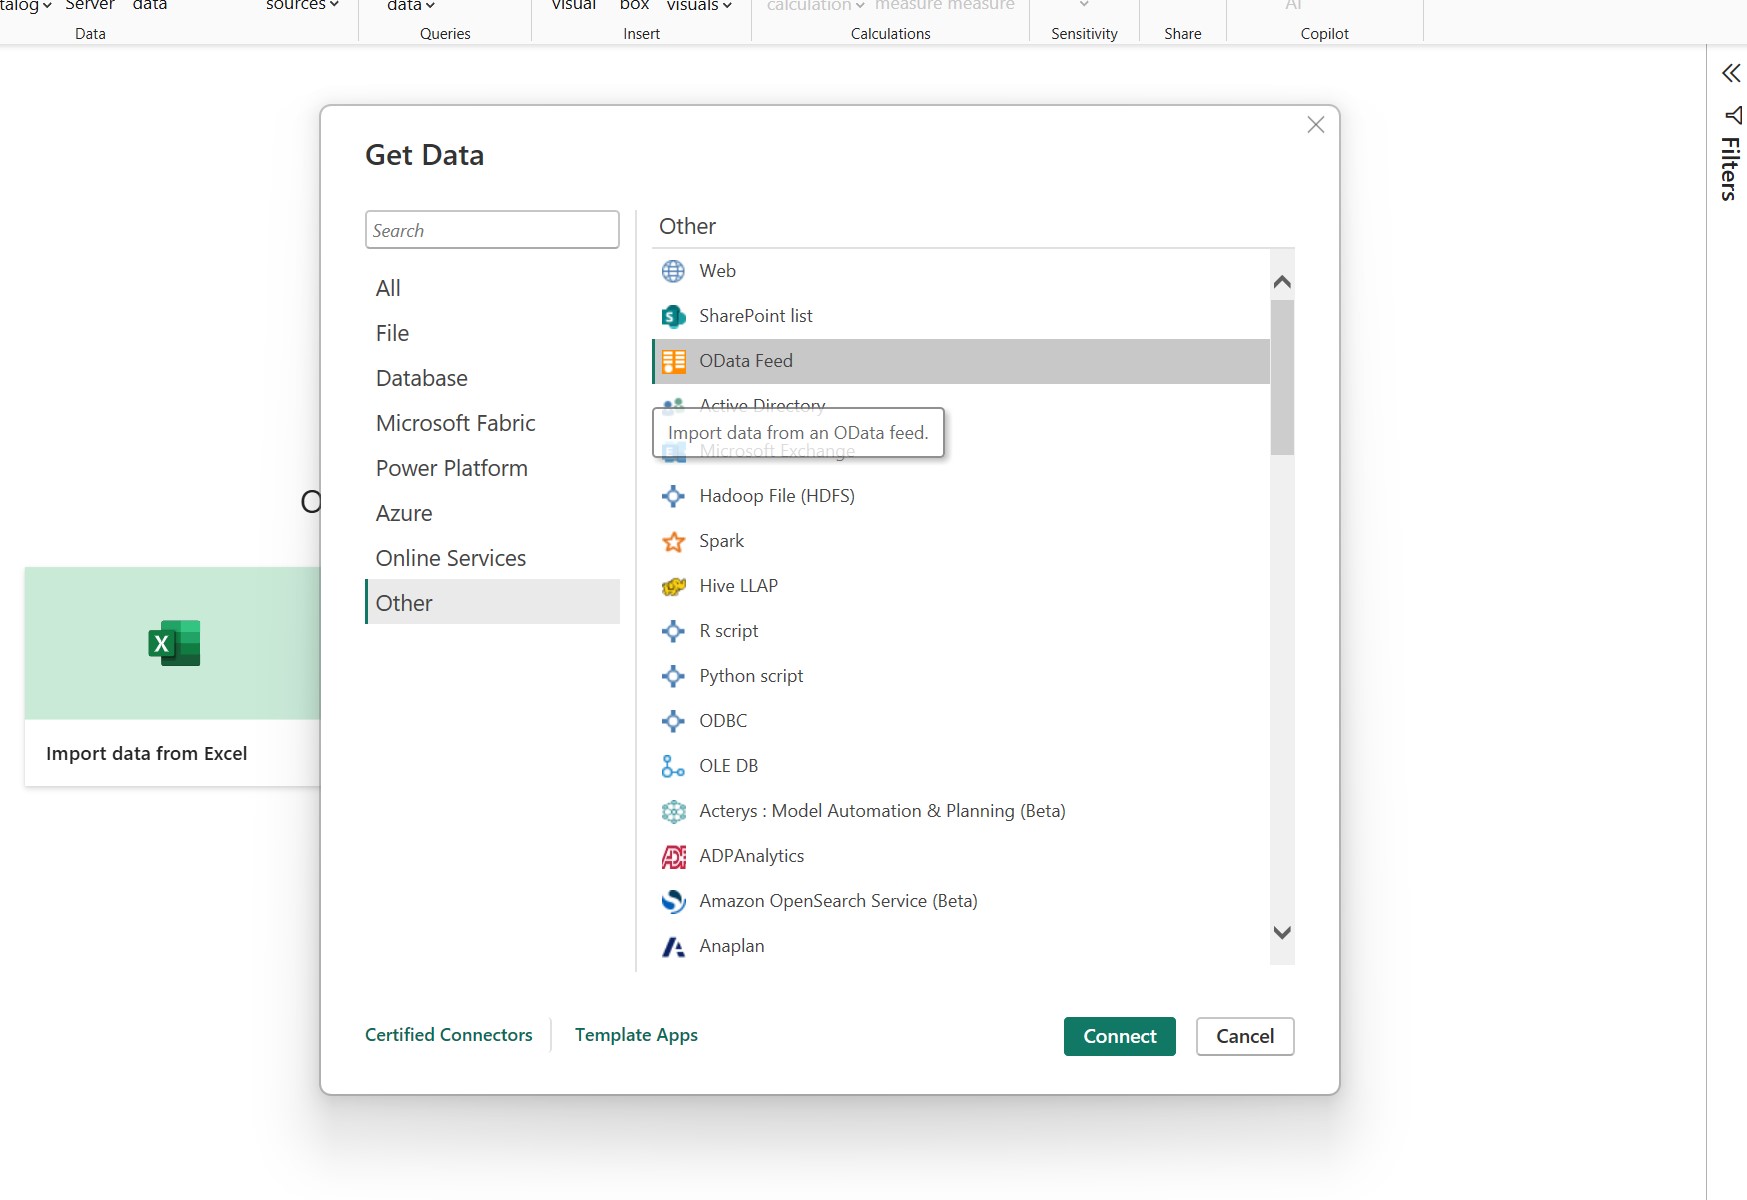
- In the Home ribbon, click Get Data, then click More...
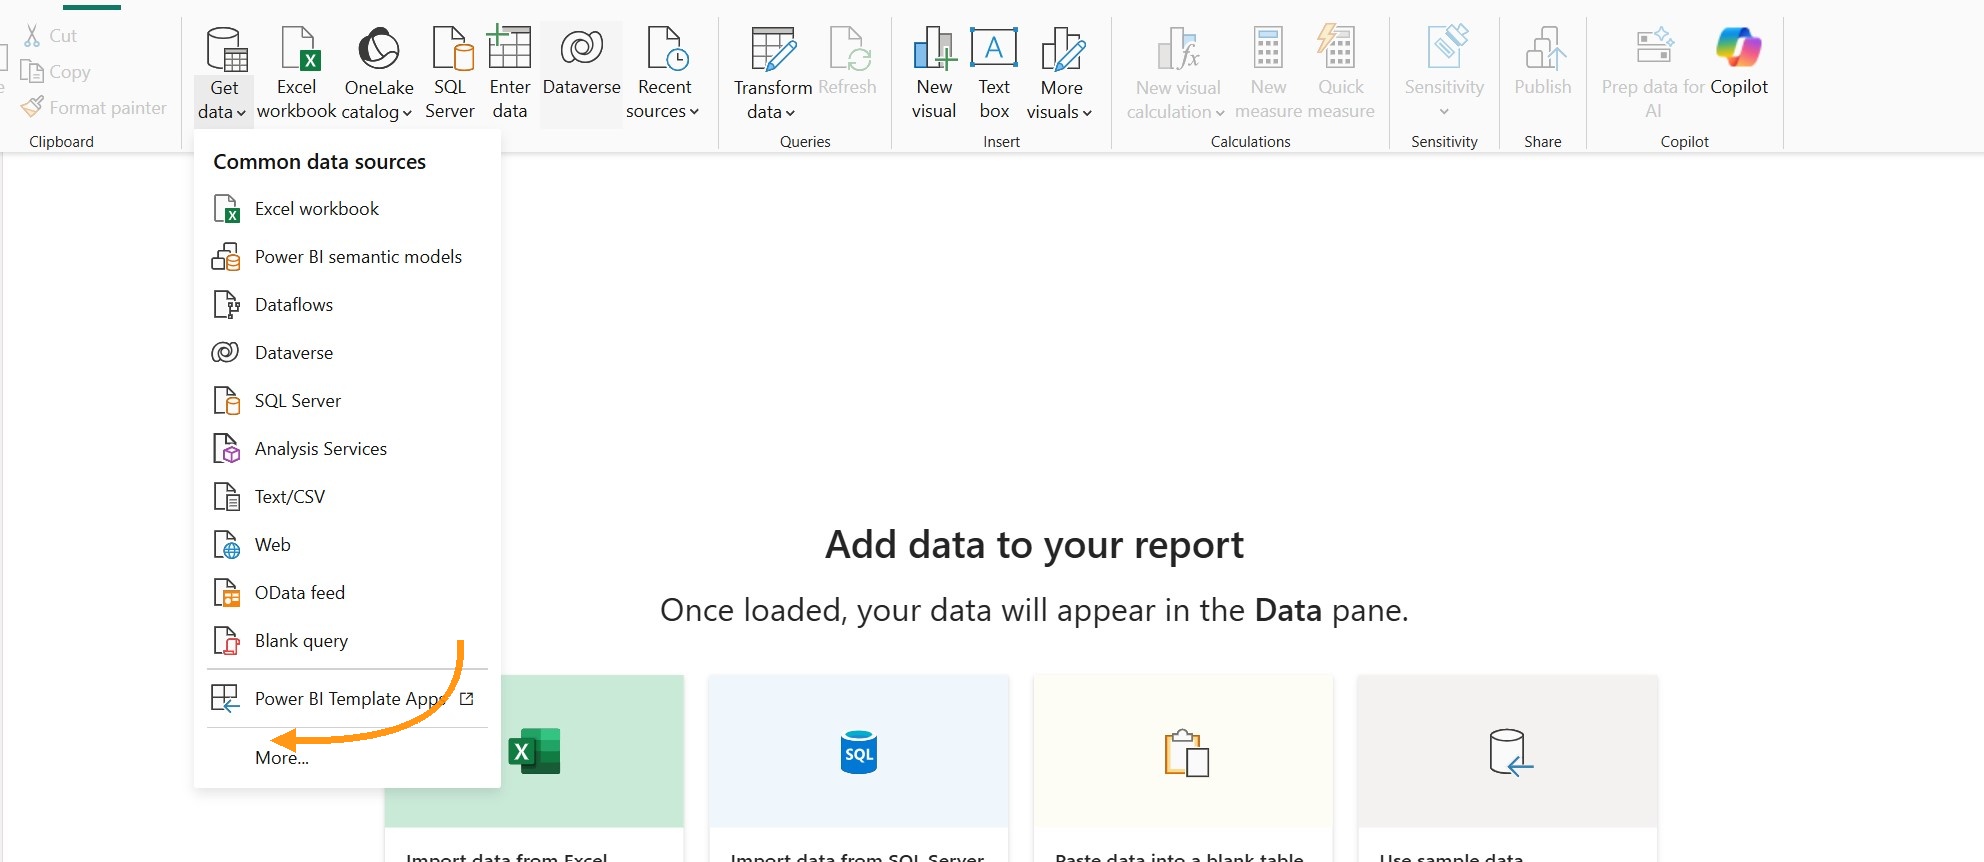
- Search for or scroll to OData Feed and select it, then click Connect
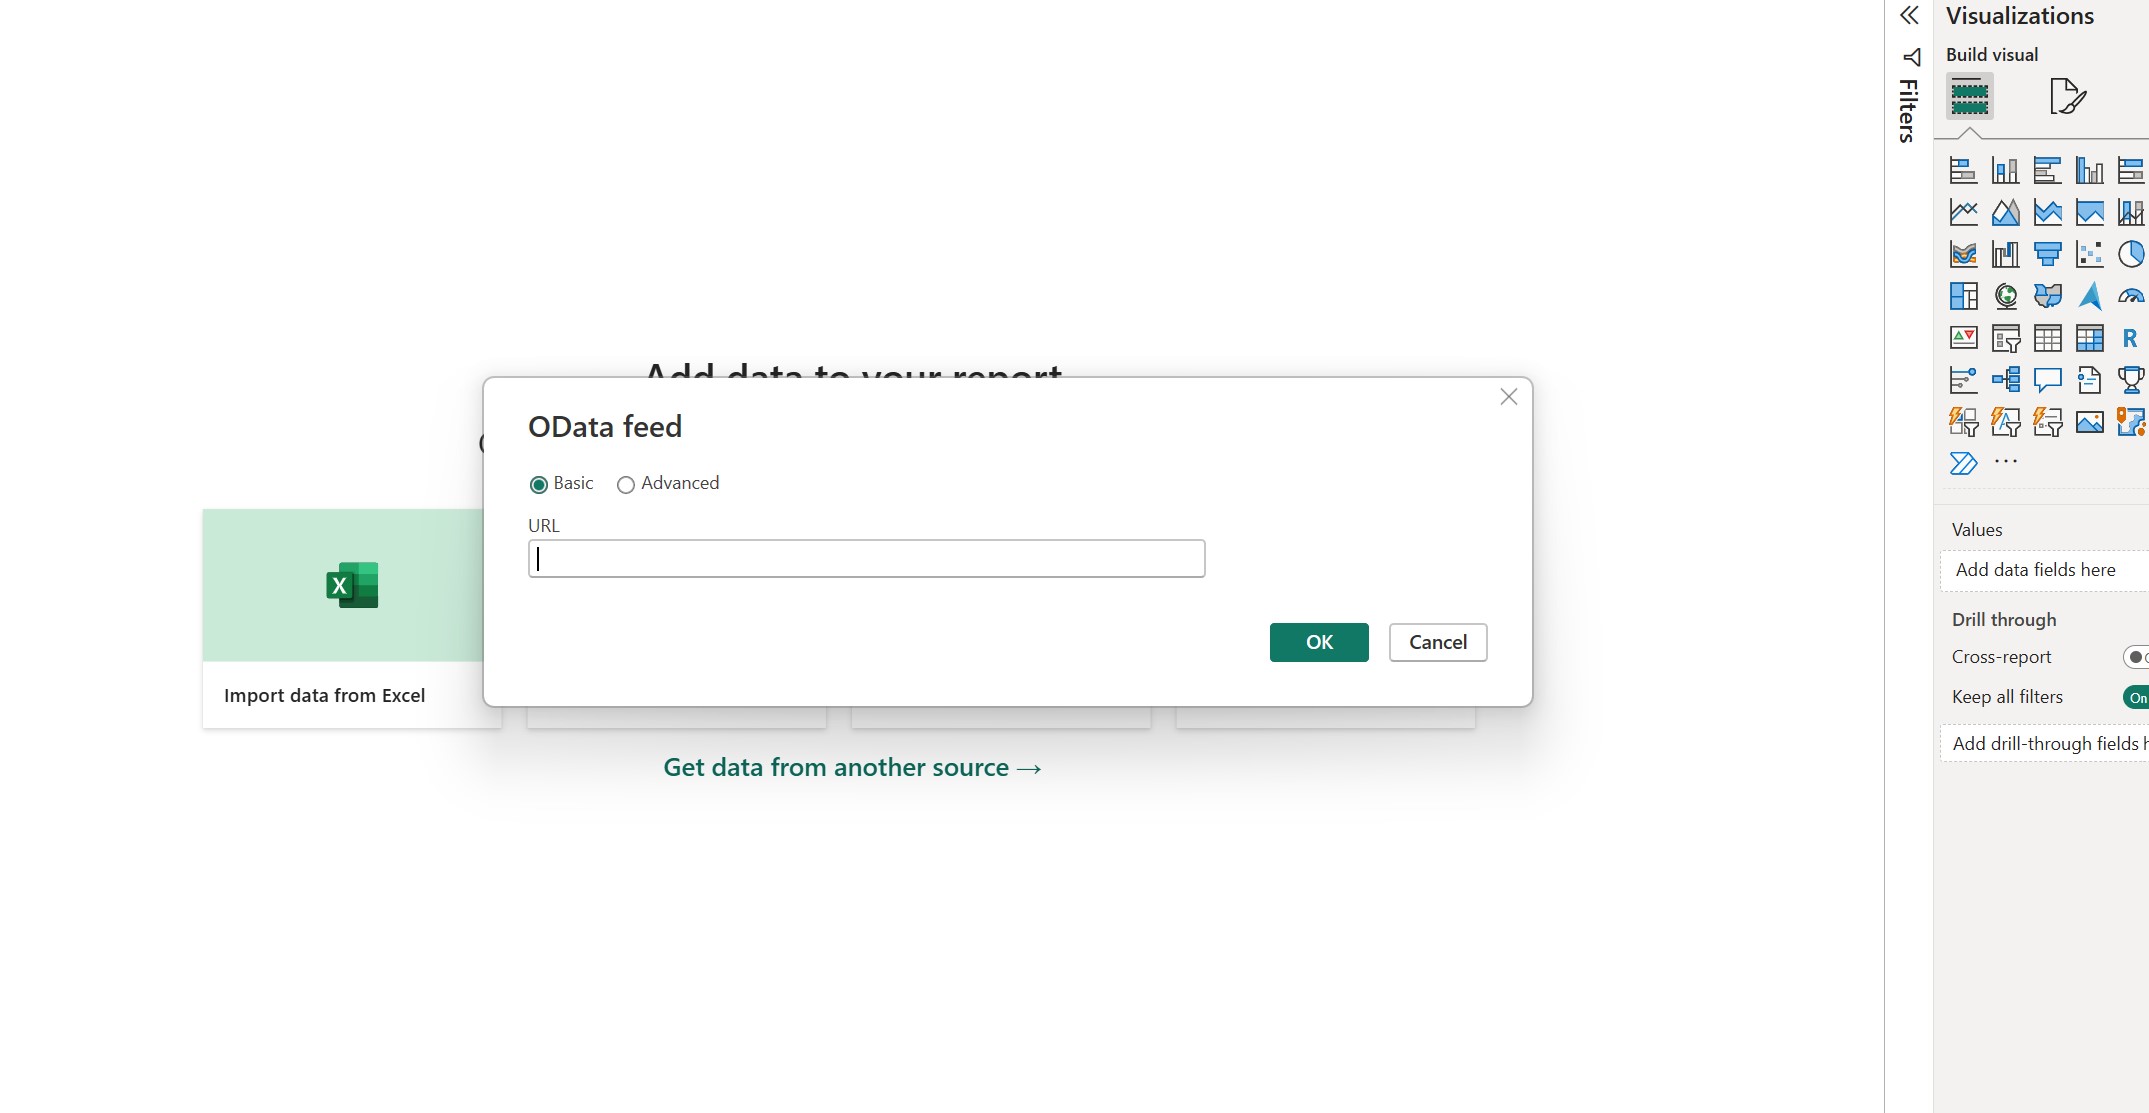
- Paste the OData URL from Tugger into the URL field
- Click OK
Power BI will connect to Tugger and show you the Navigator window, listing all available data tables from your connector.
- Select the tables you want to load (tick the checkbox next to each one)
- Click Load to bring the data into Power BI Desktop
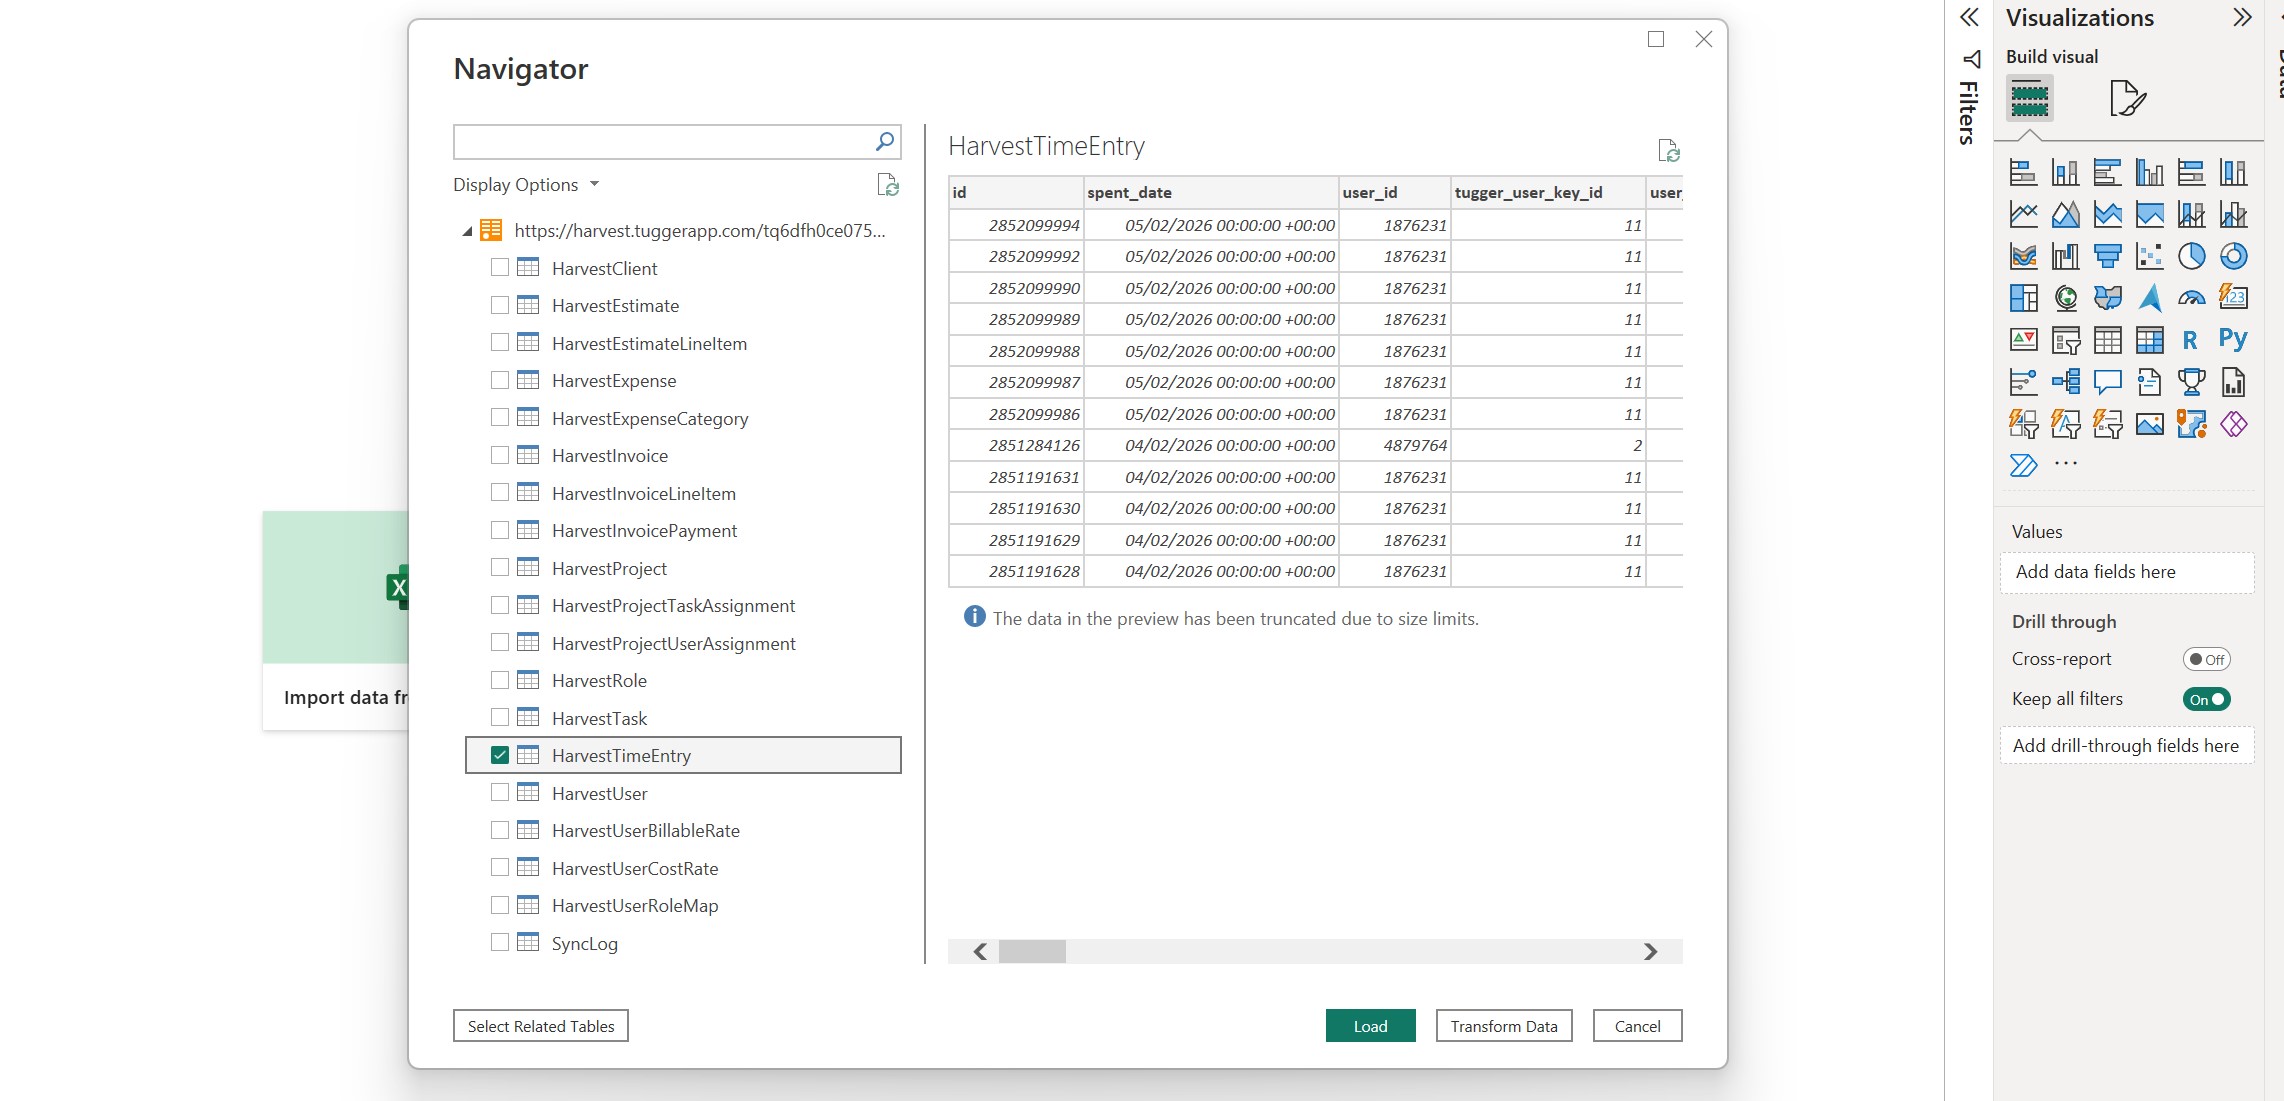
Tip: If you're not sure which tables to select, click on a table name to see a preview of its data on the right-hand side. You can always add more tables later by clicking Get Data again.
Once the data has loaded, you can start building your own visuals, charts, and report pages.
Step 3: Enter your Tugger credentials
If this is your first time connecting (or if you've regenerated your credentials), Power BI will ask you to log in.
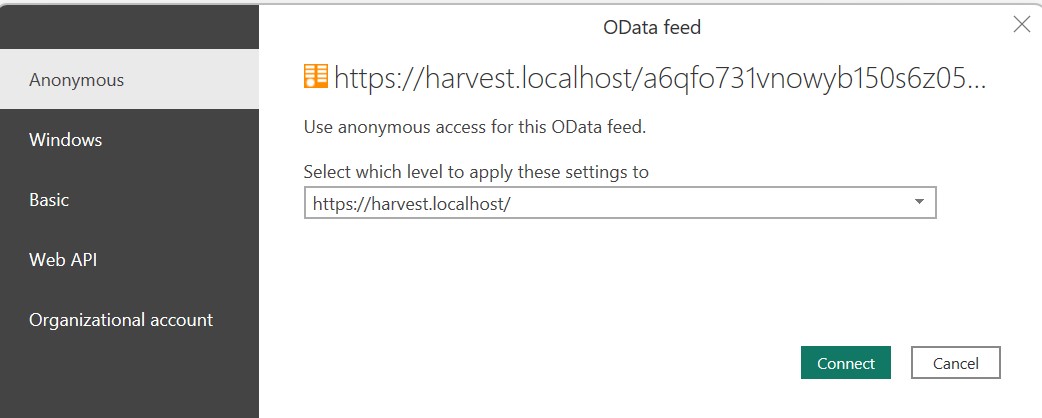
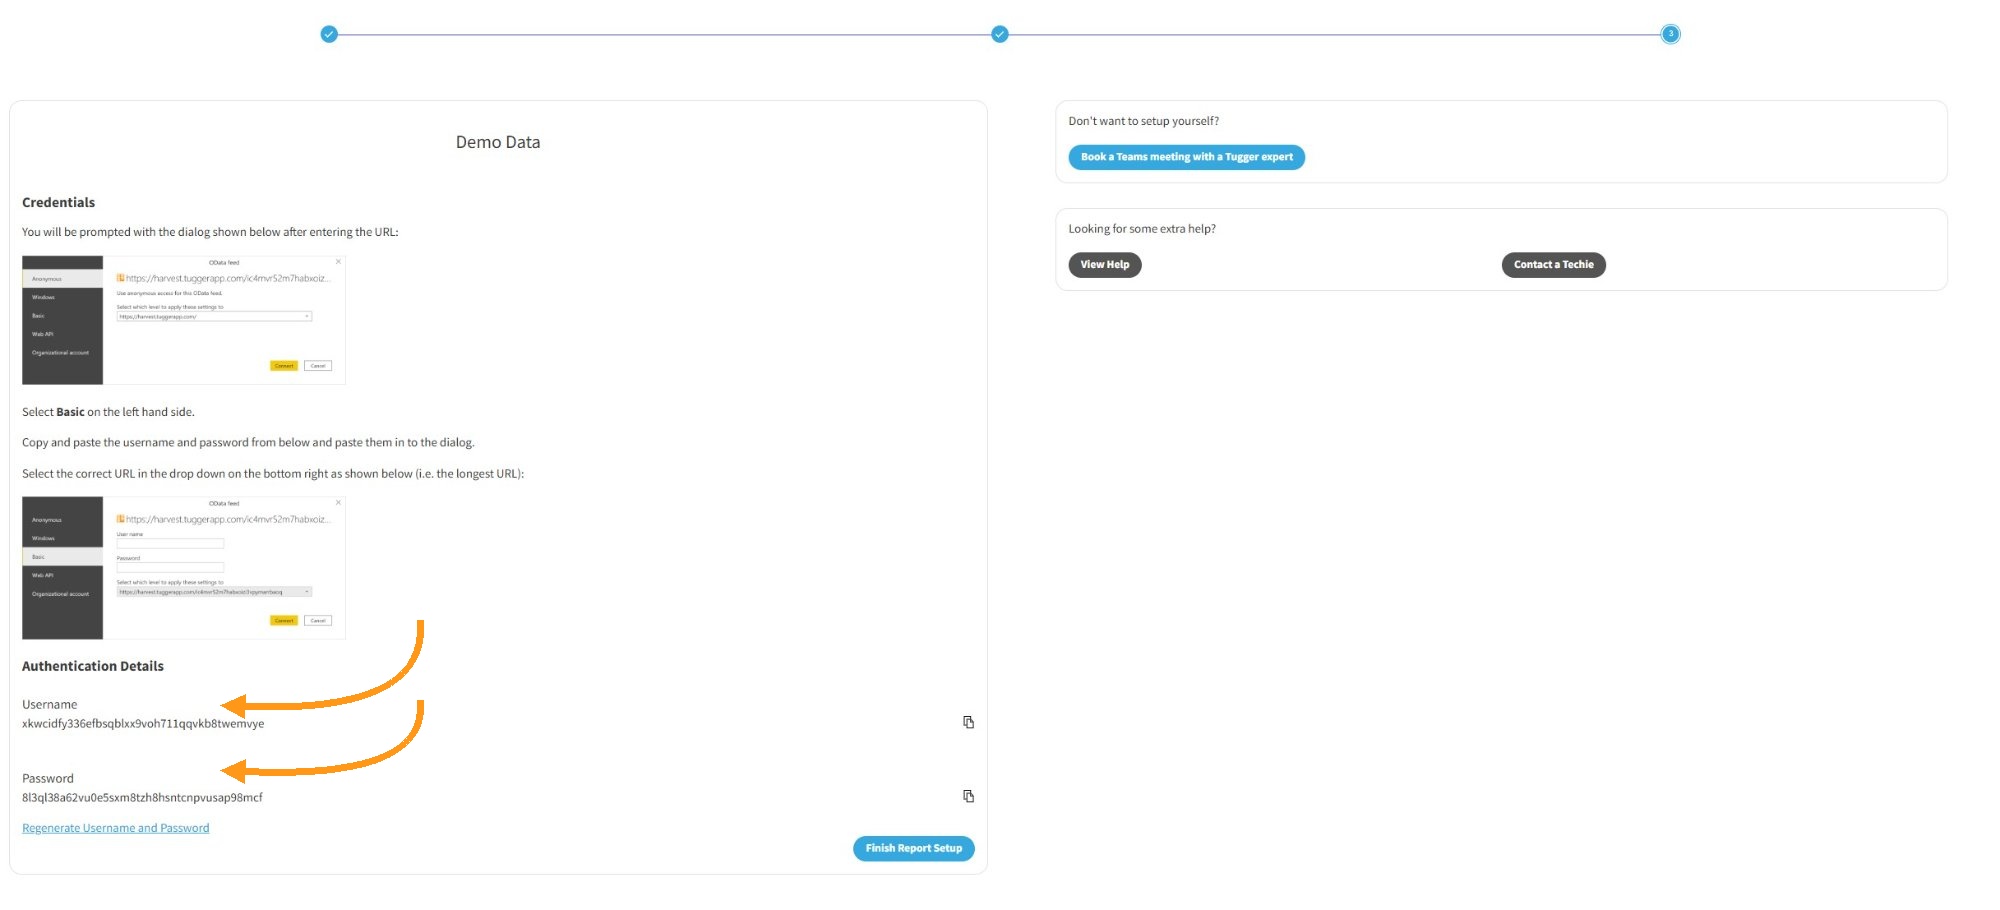
- Select Basic from the left-hand side
- Check the dropdown at the top of the dialogue - make sure it matches the base Tugger URL shown at the top. If the levels don't match, it can cause issues later.
- Enter the Username and Password from Tugger (use the copy buttons to make sure they're exact)
- Click Connect
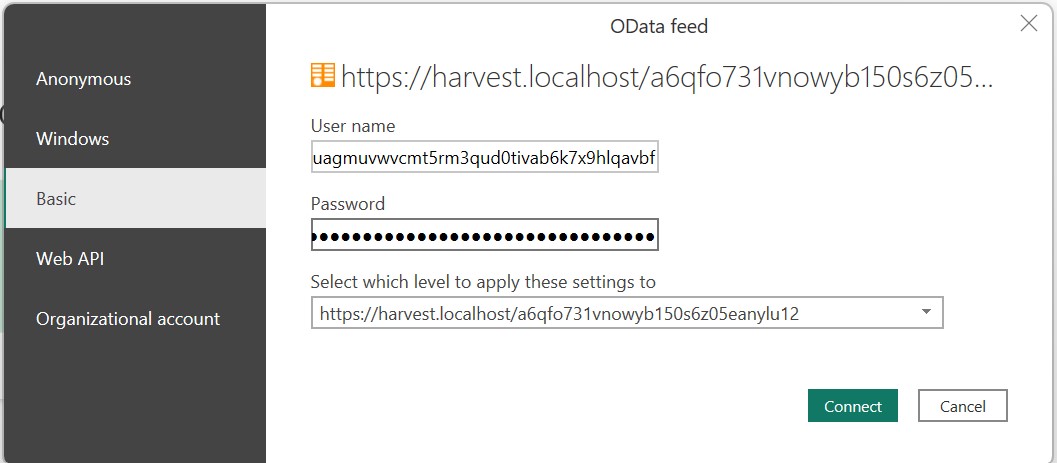
Note: Once you've entered these credentials, Power BI will remember them. You won't need to enter them again unless you clear them from Power BI or regenerate them in Tugger. See Regenerating Report Credentials for more information.
Step 4: Wait for your data to load
Power BI will now pull your data from Tugger. You'll see a refresh dialogue showing progress.
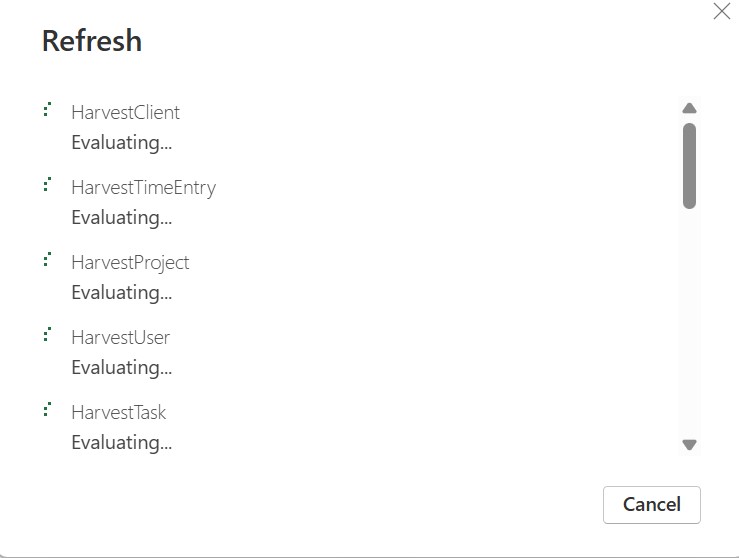
This can take anywhere from a few seconds to several minutes, depending on how much data you have. You'll see the data sizes increase as each table loads.
Once loading is complete, your report will appear with your live data.
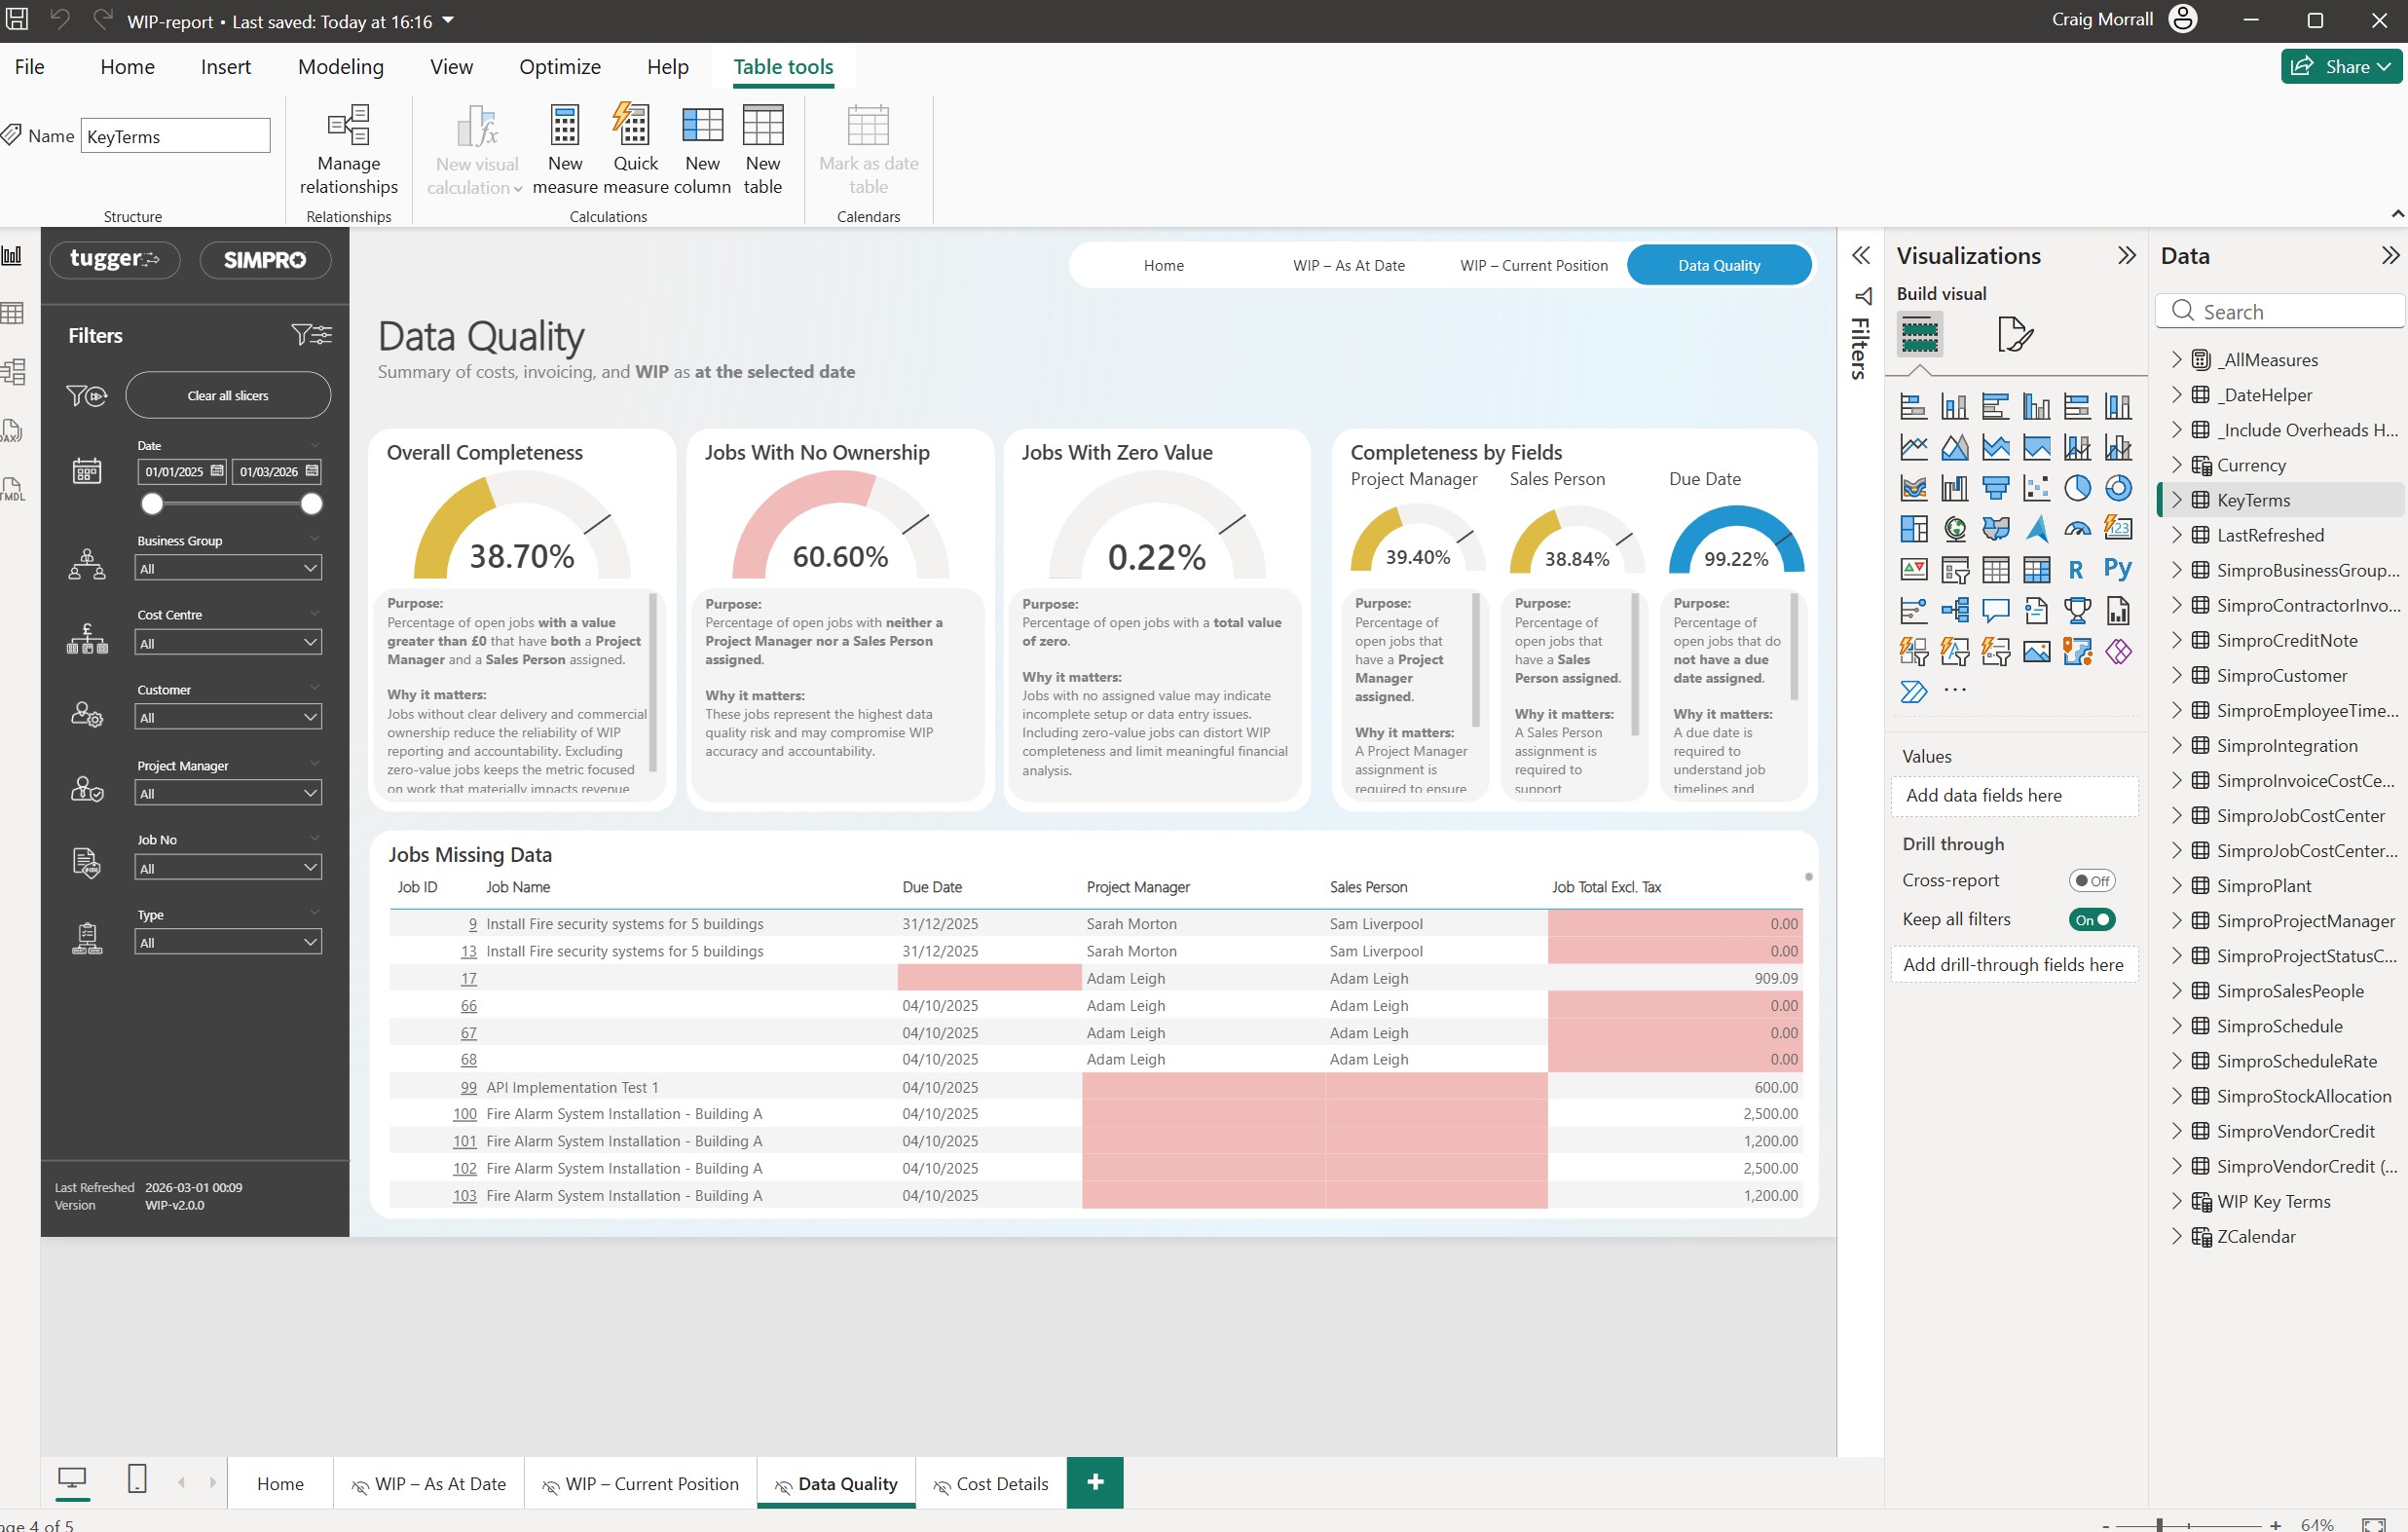
That's it - your Tugger data is now in Power BI Desktop.
What's next?
- Explore your report - use the page tabs along the bottom to see the different report pages included in your template
- Save your report - save as a .pbix file so you can reopen it without re-entering credentials
- Publish to Power BI Service - share your reports with your team. See Publishing to Power BI Service
- Customise - you're free to edit the report templates, add your own visuals, or combine data from multiple Tugger connectors
- Refresh your data - to pull the latest data from Tugger, click the Refresh button in the Home ribbon
Troubleshooting
The template file won't open
- Make sure Power BI Desktop is installed. The .pbit file needs Power BI Desktop to open - it won't work in a web browser or Power BI Service directly.
- Download the 64-bit version. If it won't install, your PC may not meet the minimum requirements.
"OData feed" login screen keeps appearing
- Check that the dropdown at the top of the authentication dialogue matches the Tugger URL. If it shows a different level, change it.
- Make sure you're selecting Basic (not Anonymous or other options).
Report loads but is blank
- Check that your first sync has completed in Tugger (Summary page).
- If you used RangeStart/RangeEnd, make sure RangeEnd is set to a future date and the format matches your regional settings.
- See My Power BI Report is Blank for more help.
Data seems incomplete or missing
- Check your data start date in Tugger - data before this date won't be included.
- If using RangeStart/RangeEnd, make sure RangeStart covers the period you need.
- See Data is Missing in Power BI Desktop for more help.
Loading is very slow
- Large datasets take longer on the first load. Subsequent refreshes are faster.
- If you're customising reports, try using a smaller date range in RangeStart/RangeEnd while you work, then widen it before publishing.
Related articles: